How to Make Crispy, Crunchy Fried Chicken

Crispy, crunchy, breaded chicken is easy. Simply deep fry it.
But if you are looking for a healthier version, that requires baking it, and sometimes the results are not as crisp or crunchy as desired. I tried several versions, and found that the secret ingredient is Panko Bread crumbs. (My preferred brand is Kikkoman.)

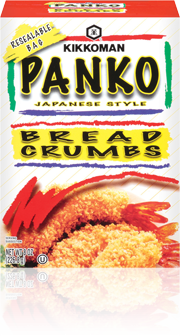
Panko Crumbs adds an excellent and light crunch to everything!
In both versions, I used a buttermilk wash and seasoned flour. I baked the chicken on a cooking rack to allow airflow around the chicken, but the pieces that were given a second coating with panko turned out demonstrably crisper and crunchier.
These pieces had a crisp and satisfying crunch and that contributed to the excellent flavor.

This was very flavorful, but lacked the crunch.
The specific details:
I used chicken legs (thighs and drumstick.) I left the skin on (because sometimes I just want all the flavor possible.) I think this technique would work with skinless chicken, and I will run that test soon.
I seasoned 1 cup whole wheat flour with 
  • 2 tsp onion powder 
  • 1 tsp garlic powder
  • 1 tsp black pepper 
  • 1 tablespoon rubbed sage. 

My wash was buttermilk.

The flour-only version was dipped in buttermilk and rolled in flour. The panko version was rolled in the seasoned flour first, then dipped in buttermilk and coated in panko.

Bake on a cooking rack in another shallow pan (I used a 10x15in jelly roll pan) at 425F/225C for 15 minutes, then 375/190C for 30-35 minutes or until the internal temp is 165F/74C.
Don’t bake solely based on time. If you remove the chicken at 165F/74C, you will have perfectly cooked chicken that isn’t dry. However, the downside of this is you don’t get the beautiful golden-brown color of deep-fried chicken. (I can live without the color!)
—————————
This recipe was requested from Tosha, one of the listeners of my podcast, Make Your Someday Today. In MYST 53, Tosha left a message on my voicemail system (Speakpipe) which you can find on my home page. If you have a question, please give me a call!

Broccoli and Cheddar Quiche

Broccoli and Cheddar Quiche
Serves 6

One 9″ pie crust (store bought or homemade–I used store bought because I was in a hurry.)
1 large head of broccoli, cut into bite-sied chunks
1 whole egg
3 egg whites
Spices/Herbs (I used 1 tsp Penzey’s Sunny Paris. You can use the herbs of your preference.)
2 ounces shredded cheddar cheese

  1. Preheat oven to 375.
  2. If frozen, thaw the broccoli. If fresh, chop as directed and microwave until hot, but not soft (5 minutes.)
  3. Spray 9″ pie tin with cooking spray. Place pie crust inside. 
  4. Whisk egg and egg white.
  5. Drain excess water off broccoli, and place in pie shell. Sprinkle herbs over. 
  6. Sprinkle half the cheese over broccoli.
  7. Pour egg evenly. Top with remaining cheese.
  8. Bake 35-40 minutes.
Nutritional data:
Calories:         213
Fat:                12.8g
Sat fat:             3.8g
Chol:          40.2mg
Sodium:   248.9mg
Carbs:           16.3g
Fiber:              1.4g
Protein:             7g
Note: this recipe makes a small quiche. The egg filling is not deep. If you want this to be more substantial, double the egg and egg whites. Keep the broccoli and cheese the same.
You can also vary the ingredients. You can use different vegetable, or add meats. Use all whole eggs if you want. Your options are only limited by your imagination and the ingredients in your fridge and pantry.
——————————-
Note: the link to Penzy’s is NOT an affiliate link. Affiliate links will earn me a small commission when readers purchase something. Not all links are affiliate links. Many are placed here only to make your cooking easier. When you do click on and buy an item from an affiliante link it does not change your cost at all, but it will help me continue to provide recipes and advice here and in my podcast Make Your Someday Today

Chicken Pot Pie

Chicken Pot Pie
Serve 6 (8 ounces per portion)

1 tsp olive oil
1/2 cup onion, diced
2-4 cloves garlic, minced
12 ounces cooked boneless/skinless chicken, diced
1 can (approximately 12 ounces) cream of chicken soup (you can also use cream of celery or mushroom)
1/2 cup wine (your choice, I used a sweet Marsala for this)
12 ounces frozen mixes vegetables, thawed
1 prepared pie cust (homemade or store bought)

Preheat oven to 400F.
Heat large non-stick skillet over med-high heat.
Add oil, onion and garlic. Saute for 2-3 minutes.
Add diced chicken. Saute for another 2-3 minutes.
Add soup and wine. Mix together.
Add vegetable. Reduce heat and let it simmer. Everything should be hot when you out this in the oven.
Spray a 9″ round baker (or 8X8 square) with cooking spray.
When the oven is ready, pour chicken/veggie mixture into dish.

Carefully lay pie crust over the top. Trim edges. Cut two slits into the crust, to allow steam to escape.

Bake for 8-12 minutes, or until the crust browns.

Serve immediately, or the next day.
Nutritional data:
Calories:         305
Fat:                 11.1g
Sat fat:              3.1g
Chol:            62.6mg
Sodium:     269.1mg
Carbs:             13.3g
Fiber:                1.5g
Protein:           11.9g

Baked Eggs in Ham “Flowers”

Baked Egg in Ham “Flower”
Serves 1

1 ounce shaved ham (2-4 slices)
1 egg
Cooking spray

Preheat oven to 400F
Spray muffin tin with cooking spray.
Line the tin with ham slices.

Carefully crack egg into the ham flower.

Bake for 15-18 minutes, or until the egg is set. Remove before it is fully cooked, it will continue to cook for about 3 minutes after removing.

When done the yolk should be thick and hot, but still fluid.

I served it on a toasted whole grain English Muffin, topped with a slice of horseradish cheddar and a drizzle of coarse German mustard.

Awesome!

Nutritional data (as I served it):
Calories:       373
Fat:             20.5g
Sat fat:          9.8g
Chol:         416mg
Sodium:    855mg
Carbs:         14.3g
Fiber:               2g
Protein:       31.7g

Artisan Bread (with less than 10 minutes of work!)


We are all busy. It’s unfortunate, but true. However, few people are truly too busy to make this bread. It takes less than 5 minutes on day 1, and then less than 5 minutes on day 2 to make this bread. (Of course, additional time is needed for rising and baking, but those happen without you even needed to be in the kitchen.

It is almost automatic bread. And it is absolutely delicious. Bread this good might be illegal in some jurisdictions!


My Homemade Artisanal Bread

Makes 10 slices, each approximately 1.5 ounces.
My recipe (for 4 one-pound loaves)

Whisk together:
3 cups tepid water (95-105F)
1 tablespoon yeast (any dry yeast)
1 tablespoon salt (any type)

Stir in 6.5 cups of flour. Any flour works, but 100% whole wheat is a challenge. Mixing white with whole wheat and/or rye work well. I usually use at 4 cups general purpose white with 2.5 cups of whole wheat. As long as you use a total of 6.5 cups of flour, you will end up with bread.

Stir just until everything is wet and combined. Do not knead–ever. Cover loosely, and let rise on the counter for 2-3 hours (if you forget overnight, don’t worry, it will not ruin the bread.) Place in the refrigerator overnight.

The next day, cut 1/4 of the dough out. Dust with flour. Working quickly, form the dough into a ball. 


For the greatest ease, place the formed loaf of a corn-meal dusted pizza peel.
                                                        
                                            Picture from Amazon. I use this exact Pizza Peel

Let the dough rise for 40 minutes. These make free-form round loaves, not rectangles.  Do not bake in traditional bread pans.

Preheat oven and baking stone to 450. Boil 2 cups of water, and pour into an oven safe dish and place in the oven while pre-heating. (The water creates steam to help develop a very crunchy crust. It will work without the steam, but the crust isn’t as nice.)

When the dough has risen, make several shallow cuts in the surface of the dough. Sprinkle corn meal on baking stone and place dough on the corn meal. Bake for 35 minutes.

The dough will keep in the fridge for up to 14 days and as it ages, the flavor develops into more of a sour dough character. When the last of the dough is used, do not wash the container. Immediately refill with the ingredients for more bread (this will quickly develop that wonderful sour dough flavor.

Nutritional Data:
Calories:         66
Fat:                0.4g
Sat fat:           0.1g
Chol:              0mg
Sodium:  117.2mg
Carbs:          14.2g
Fiber:             2.4g
Protein:          2.7g


——————————
Finding simple ways to enjoy life, and yet stick to both a financial and calories budgets are common themes on my Make Your Someday Today podcast, We all want the best of all possible options. When you take a little time to make your own, you get the best results.

Baked Eggs in Potato Cups

Baked Eggs in Potato Cups
Serve 2

This is a great way to use a leftover baked potato. If you don’t have any left, you can easily microwave a potato in about 5 minutes, while getting your morning coffee ready.

1 large potato
2 eggs
1 slice of cheese
salt and pepper as needed
Sriracha sauce (or your preference)

Preheat oven to 450F
Cut baked potato in half the long way.
Scoop out most of the potato, leaving less than a 1/4 inch of potato.

Season with salt and pepper (if needed).
Crack an egg into the potato cup. You may not have room for all of the white (depends on the size of the potato.
Place 1/2 slice of cheese over egg.
Bake for 8-12 minutes (8 will be very soft-cooked and 12 minutes will be fully hard cooked.)
Drizzle with Sriracha and let cool for a couple minutes.

    Nutritional data (approximate, as different sized potatoes, scooped out more or less will change this):
    Calories:            187
    Fat:                   8.9g
    Sat fat:              3.9g
    Chol:          199.5mg
    Sodium:       93.3mg
    Carb:               15.4g
    Fiber:                1.4g
    Protein:           11.4g

    Baked Cod, Garlic Sauteed Spinach and Baked Fries

    Baked Cod with Garlic Spinach and Baked Fries

    This is an easy meal, that will be ready to eat about 45 minutes after you put the potatoes in the oven. Meals like this are healthy, easy, inexpensive (especially if you buy frozen fish when it is on sale) and are convenient as the potatoes and fish cook at the same temp, at the same time. Using bagged baby spinach makes this quick. Just don’t use pre-chopped garlic from a jar. That tends to be old and bitter.

    We talk about planning ahead and making good choices like this on my Make Your Someday Today podcast. When you take the little time to make plans in advance, you are able to save more time, live healtier, lose weight and save money! What a great combination!

    You can make this with any white fish (cod, haddock, pollack, flounder are all good choices.) In general, place the fresh (or thawed) fish in an oven safe pan, drizzle a hint of olive and then sprinkle dill, salt and pepper as needed. (Garlic or onion powder are also good options. Another excellent option is Penzey’s Sunny Spain.) Bake at 450 for 8-12 minutes, dependingon thickness of the fillets. The fish is done when it begins to flake it you lift an edge with a knife.

    Garlicky Sauteed Spinach
    Serves 2-4, depending on how much everyone likes spinach.  In our case, this made three servings.
    15 ounces baby spinach  
    1 tablespoon olive oil
    6 large cloves garlic, sliced thin
    1. Prepare all ingredients, but don’t start cooking this until the fish and potatoes are done. This only takes about 4 minutes once the pan is hot.
    2. Heat your non-stick skillet (large, 11-12 inches).  Add olive oil.
    3. Add garlic, stir until it begins to brown (1-2 minutes.)
    4. Add half the spinach, tossing frequently for 1 minute. It will begin to wilt.
    5. Add remaining spinach, tossing constantly until the spinach is uniformly wilted (another 60-90 seconds.)  
    6. Serve immediately.

    Nutritional data:
    Calories:       83
    Fat:             5.3g
    Sat fat:        0.8g
    Chol:           0mg
    Sodium:   119mg
    Carbs:         7.4g
    Fiber:          3.4g

    Protein:       4.7g
    Baked Fries
    Serves 4
    2 large Russet (baking) potatoes
    2 tablespoons oil
    Salt and pepper
    1. Preheat oven to 450F
    2. Wash  potatoes.
    3. With skins on, cut potatoes into 1/2″ thick fries.
    4. Place in bowl. Drizzle oil, toss and season as desired.
    5. Place on baking pan and bake for 40-45 minutes. Turn and toss every 15 minutes.
    6. After 30 minutes, place the pan with fish in the oven. The fish and fries will finish at about the same time. 
    7. When the fish is done, remove from oven and cover with foil to keep warm. Do not cover the fries or they with steam and get soft/soggy. When done, they should be brown and crisp.

    Calories:     205
    Fat:             7.2g
    Sat fat:        1.0g
    Chol:           0mg
    Sodium:  20.9mg
    Carbs:       32.1g
    Fiber:          3.4g
    Protein:       3.9g
    —————————————
    My podcast, Make Your Someday Today is a twice-weekly show, where we talk to successful people in all walks of life and around the world on Monday, and then on Thursday, I take a specific message from the previous guest and give my “Trevitorial”, where I help you apply that message to your life. The entire purpose of the show is to help all of us overcome our challenges and fears and become the person we want to be, the person we deserve to be. I hope you give it a listen! 

    Roasted Brussels Sprouts with Mushrooms

    Roasted Brussels Sprouts with Mushrooms
    Serve 6

    Served here with roasted fingerling potatoes and a baked Atlantic cod.

    1 pound fresh Brussels sprouts (approximately) halved it they are large
    1 pound mushrooms, any type, washed and sliced
    4 tablespoons olive oil, divided
    Seasoning of your choice (I used Penzey’s Sunny Paris)

    1. Preheat oven to 450.
    2. Place the Brussels sprouts in a large Ziploc baggies.
    3. Add half the oil and the seasoning. Toss to coat.
    4. Empty the baggie into a 9×13 pan or other roasting pan.
    5. When the oven is ready, place on top shelf.
    6. Using the same baggies, place the mushrooms in it.
    7. Add remaining oil.
    8. After 15 minutes, stir the Brussels sprouts and pour the mushrooms on top.
    9. Roast for 15 more minutes, stirring half way through.
    Nutritional data (1/6 of the pan, approximately 1 heaping cup):
    Calories:       145
    Fat:             12.9g
    Sat fat:          3.7g
    Chol:        13.3mg
    Sodium:    20.6mg
    Carbs:           7.1g
    Fiber:            2.5g
    Protein:         3.1g

    To roast fingerling potatoes, toss with 1-2 tablespoons olive oil and your preferred seasoning. (I used Penzey’s California Style Seasoned Black Pepper, which is black pepper, red and green bell peppers, onion and garlic.) Place in a roasting pan at the same time you start the Brussels sprouts, tossing them half way through. The potatos will be done with the sprouts and mushrooms.

    To bake the cod, spread 1-2 tablespoon butter in a 8×8 or 9×13 baking pan (depends on how much you are baking). Lay the cod on the butter in a single layer. Sprinkle with pepper (and salt, if desired.) Place in the oven when you add the mushrooms to the Brussels sprouts.

    The entire meal will be done at the same time.

    Chicken Enchiladas

    These may not be 100% authentic, but they are fast, easy, healthy and most of all, delicious!

    My Simple Chicken Enchiladas
    Serves 7-8 (one piece)

    8 ounces cooked chicken, shredded
    1/4 cup black olives
    1/2 cup cheddar cheese (divided)
    2 ounces soft goat cheese
    1/4 cup onion, minced
    1/2 – 1 cup fresh cilantro, chopped
    8 soft tortillas (6-8″)
    1/2 cup salsa (divided), red or green.

    1. Preheat oven to 350.
    2. In a medium bowl, mix together chicken, olives, 1/4 cup cheddar cheese, the goat cheese, onion and cilantro.
    3. Spray a 9×13 baking pan with cooking spray.
    4. Spread 1/4 cup salsa on the bottom of the pan.
    5. Taking a tortilla, scoop 1/8 of the mix, place on the tortilla and roll as in the above picture. Place in the baking pan.
    6. Repeat with all tortillas.
    7. Spread remaining salsa on the top of the tortillas. Top with the remaining cheese.
    8. Bake for 16-18 minutes, or until the cheese begin to brown.
    9. Serve with shredded lettuce, tomatoes and sour cream (or Greek yogurt.)
    Due to poor planning, I only had 8 inch tortillas, so the nutritional data will reflect that. I think it would have been better with 6 inch tortillas, and would have obviously had fewer calories. But sometimes you need to work with what you have.

    This is another great way to use “chicken over-production” (aka “left-overs.”) You could also replace the chicken with ground beef, or shredded beef, pulled pork, or even fish (tilapia, whitefish, flounder.) Or replace the meat with beans. The key to making this easy is to use what you have on hand, and when you use precooked meat, all you are doing is reheating it. You could even make these, wrap them tightly and freeze them individually for later use, and just thaw and heat in the microwave. (If you do that, don’t top with the sauce and cheese until you are ready to heat them.)

    Nutritional data:
    Calories (per piece): 179
    Fat:                         10.2g
    Sat fat:                      3.4g
    Chol:                    31.5mg
    Sodium:              641.4mg
    Carbs:                     19.3g
    Fiber:                      12.2g
    Protein:                   15.5g
    The high sodium level is due to almost everything about this recipe: the tortillas, the salsa, the cheese, the olives. And once in a while, I am okay with that, because this is such a good meal.

    Here is a quick question for any beer drinkers out there: 
    If I were making this for you, which beer would you most want me to serve with it, and why that beer?

    Baked Avocado Fries

    Bake Avocado Fries
    Serves 2

    1 ripe avocado, seeded and sliced into 8 wedges
    1 egg white
    2 tablespoons water
    1 tablespoon corn meal (but you will only use about 1 teaspoon–the rest just makes it easier to work with.)
    1/4 cup panko bread crumbs
    Your preferred spices and herbs

    1. Preheat oven to 450. Coat a cookie sheet with cooking spray.
    2. Mix corn meal with spices (I used garlic powder.)
    3. Mix herbs with panko crumbs (I used dried basil.)
    4. Coat avocado wedges in corn meal.
    5. Whisk egg white and water until lightly frothy. 
    6. Dip each wedge in egg white, one at a time. Roll in panko crumbs and set on prepared cookie sheet.
    7. Baked until browned (16-20 minutes, depending on your oven.)
    Serve warm with a sauce or dip. This recipe went well with a ranch salad dressing. 
    Development notes:
    Special thanks go to Andrew Carpenter for sending me a picture of this recipe. 
    Since I had never made this recipe before, I several versions. I also tried a version using a thin Greek yogurt wash (2 tablespoons yogurt with 2 tablespoons milk.) It had no better flavor than the egg wash version, but the egg wash created a better crunch. I also tmade a southwestern style, replacing the garlic powder with chili powder and dried cilantro for the basil. That tasted good with a spicy sauce (I like Sriracha.)
    I considered not using the corn meal coating, but I opted to use it because the corn meal coating helps the egg wash stick to the avocado, creating a better crunch. It only adds about 5 calories and 1 gram of carbs to each serving.
    Nutritional data:
    Calories:     151
    Fat:          10.7g
    Sat fat:       1.5g
    Chol:          0mg
    Sodium:    56mg
    Carbs:      11.7g
    Fiber:         4.9g
    Protein:         4g