MYST 183: Chickens and Other Changes

So, backyard chickens alone won’t disrupt a weight loss plan. But if you decide to get backyard chickens, and then other life events strike (and nothing that is considered a “strike” is usually good) then the combination can roll into a mess.

That’s what happened to me.

I received three new chickens in April. Coop and run construction took me six weeks instead of a few days. “Generalized work stressors” for all employees of our facility began in April with monthly lists of job eliminations. At the end of June, we found out that our 12-year-old pug was terminally illness for your beloved dog. Lastly, then the “generalized work stressor” became a personal job elimination.

All of that began in mid-April and is still continuing (as the job search is ongoing.) All of those emotional drains reduced my ability to continually make good eating choices. All my weight loss progress that I made between February 2018 and now was reversed. And a relatively large part of me doesn’t really care. There simply are too many demands on my mental and emotional reserves.

And I know it’s happened to you at some point, too.

So, how to break the cycle?

More of that in the next episode!

Here are a few pictures of the coops and chickens. Here is a link to my YouTube page with more chicken-related videos.

The materials arrive

Roxie (Plymouth Rock) Penny (Rhode Island Red) and Esther (Easter Egger) at about 20 days.
Esther, Penny and Roxy at 10 weeks.


What are you waiting for? Success isn’t an accident!

All photos are my personal photos, and cannot be used without permission.

_________________________

Music composed and performed by Jason Shaw, courtesy of Audionautix.com

Voiceover courtesy of Matt Young. Matt is a professional voiceover artist. If you have any need of voice-over work, for your podcast, radio spot, or whatever, you can reach Matt by a variety of methods. He is on LinkedIn. On Twitter. And Google+. Follow his Facebook page to learn how to better use social media. Matt was also my guest on MYST 54. Give his story a listen!


My Secret Thanksgiving Stuffing Recipe

(Photo to be added later.)

Poultry Stuffing
Makes 12 portions (approximately 4 ounces by weight, about 2/3 cup by volume)

This looks like a scary long recipe, but it is really very simple.

18 slices Healthy Life bread (or any preferred bread.)
2 tablespoons olive oil
1 large yellow onion, diced
4 stalks celery, diced
2-4 clove garlic, mashed and minced
Spices and herbs (rubbed sage, garlic powder, onion powder, black pepper, celery salt or anything similar.)
Chicken stock (approximately 2 cups) warmed, but not boiling

1. Preheat oven to 425F
2. Lay bread slices on counter. Spray lightly with cooking spray.
3. Sprinkle lightly with sage, onion, garlic, pepper and celery salt.
4. Lay on cookie sheets in oven, until beginning to brown and are dry (about 30 minutes).
5. When toasted, cut into small cubes. Set aside in a large bowl.
6. In a large non-stick skillet, heat over med-high.
7. Add olive oil. When hot (the oil should shimmer) add onion and celery.
8. Saute until the onion begins to turn translucent (2-4 minutes.)
9. Add garlic. Saute for 1 minute.
10. Add 1 teaspoon rubbed sage, 1/4 teaspoon each celery salt (or powder) and black pepper. Saute for 1 minute.
11. Pour onion-celery mixture over bread cubes.
12. Pour half the chicken stock, gently mixing. Add more stock as needed. Mixture should be evenly moistened, but not soupy. (If you add more stock, and it doesn’t get absorbed, that is too much. Pour it off.)
13. If you still need more liquid, you can use hot water, or any preferred liquid for added flavor: beer, wine, apple juice/cider.
14. Preheat to 350.
15. Put stuffing a 2 quart casserole, sprayed with cooking spray for easy clean up.
16. Bake uncovered until hot (30-45 minutes.)

Nutritional data:
Calories:       80
Fat:              2.4g
Sat fat:         0.3g
Chol:           0mg
Sodium:  109.mg
Carbs:        14.7g
Fiber:           3.4g
Protein:        3.3g

A few notes:
I use my own homemade chicken stock, which has no added salt. That accounts for the low sodium numbers in this recipe. You can use commercially prepared stock, but it will have more sodium. On the other hand, you can find fat free chicken stock, which will result in even lower calories per serving because mine isn’t fat free. (Everything is a trade-off.)

Use your favorite herbs and spices. Penzey’s Spices makes incredible mixes. Their Sunny Paris is excellent in this.

Instead of Healthy Life bread, use your favorite bread. Whole wheat makes a much more robust version (and needs more liquid). Cornbread is sweeter and more delicate.

Add hot peppers if you like a spicy version.

If you want a sweeter variation, add 2 chopped apples or pears to the onions and celery.

Mushrooms work well in this (I like fresh baby bellas.)

Add meats (bacon, chicken/turkey trimmings, sausage, burger, oysters/clams, chorizo, Andouille, bratwurst or anything) if you want. It will add calories, but also add more flavors.

I don’t like to stuff turkeys. It slows the cooking time on the birds, increasing the risk of dried breasts while you wait for everything to cook. That is why I make it in a casserole separately.

How to Make Crispy, Crunchy Fried Chicken

Crispy, crunchy, breaded chicken is easy. Simply deep fry it.
But if you are looking for a healthier version, that requires baking it, and sometimes the results are not as crisp or crunchy as desired. I tried several versions, and found that the secret ingredient is Panko Bread crumbs. (My preferred brand is Kikkoman.)

Panko Crumbs adds an excellent and light crunch to everything!
In both versions, I used a buttermilk wash and seasoned flour. I baked the chicken on a cooking rack to allow airflow around the chicken, but the pieces that were given a second coating with panko turned out demonstrably crisper and crunchier.
These pieces had a crisp and satisfying crunch and that contributed to the excellent flavor.

This was very flavorful, but lacked the crunch.
The specific details:
I used chicken legs (thighs and drumstick.) I left the skin on (because sometimes I just want all the flavor possible.) I think this technique would work with skinless chicken, and I will run that test soon.
I seasoned 1 cup whole wheat flour with 
  • 2 tsp onion powder 
  • 1 tsp garlic powder
  • 1 tsp black pepper 
  • 1 tablespoon rubbed sage. 

My wash was buttermilk.

The flour-only version was dipped in buttermilk and rolled in flour. The panko version was rolled in the seasoned flour first, then dipped in buttermilk and coated in panko.

Bake on a cooking rack in another shallow pan (I used a 10x15in jelly roll pan) at 425F/225C for 15 minutes, then 375/190C for 30-35 minutes or until the internal temp is 165F/74C.
Don’t bake solely based on time. If you remove the chicken at 165F/74C, you will have perfectly cooked chicken that isn’t dry. However, the downside of this is you don’t get the beautiful golden-brown color of deep-fried chicken. (I can live without the color!)
—————————
This recipe was requested from Tosha, one of the listeners of my podcast, Make Your Someday Today. In MYST 53, Tosha left a message on my voicemail system (Speakpipe) which you can find on my home page. If you have a question, please give me a call!

Pan Seared Chicken, Roasted with Cherry Tomatoes and Olives


Pan Seared Chicken, Roasted with Cherry Tomatoes and Olives
Serves 6

1 tablespoon olive oil
6 chicken thighs, skin-on, but excess trimmed
2-4 cloves garlic, thinly sliced
1/4 onion, diced
1-2 pounds cherry (or grape) tomatoes, halved
1/4 cup Kalamata olives, halved
1/4 cup green olives, halved. (I used Mezzetta Garlic Stuffed Olives)
Herbs of your choice (I used Penzey’s Tuscan Sunset.)
2 ounces Marsala wine (optional)

Preheat oven to 450F.
Using a 12 inch, oven-safe skillet, preheat over medium high. Add the oil.
Season the chicken, both sides, with your spices, and salt/pepper if desired.
When the oil begins to shimmer, carefully lay the chicken in the skillet, skin-side down. Let the the skin get browned. Do not turn them, or even move them to get the best results. This will take 6-7 minutes.
While the chicken thighs sear and brown, slice the garlic, dice the onion, and halve the tomatoes and olives.
After 6-7 minutes, remove the chicken to a plate and set aside.

With all cooking juices still in the skillet, add the garlic and onion, then the tomatoes and olives.

Carefully return the chicken to skillet, skin side up.

Pour the wine into the skillet (if you are using this.)
Place skillet in oven, uncovered, for 30 minutes, or when the internal temperature of the chicken is 165F.
Remove from the oven and let rest for 5 minutes before serving.

Nutritional data for one thigh and 1/6 of the tomato/olives:
Calories:          286
Fat:                 11.8g
Sat fat:              1.5g
Chol:               65mg
Sodium:     356.2mg
Carbs:             22.3g
Fiber:                2.9g
Protein:             26g

You could certainly serve this on a pasta, such as angel hair or linguini.

Don’t forget to listen to my podcast, Make Your Someday Today! It is a motivational podcast, featuring interviews with musicians, athletes, artists, entrepreneurs and weight loss success stories from around the world. I also answer listener questions, and beginning with Episode 49, I give my “Recipe of the Week!”

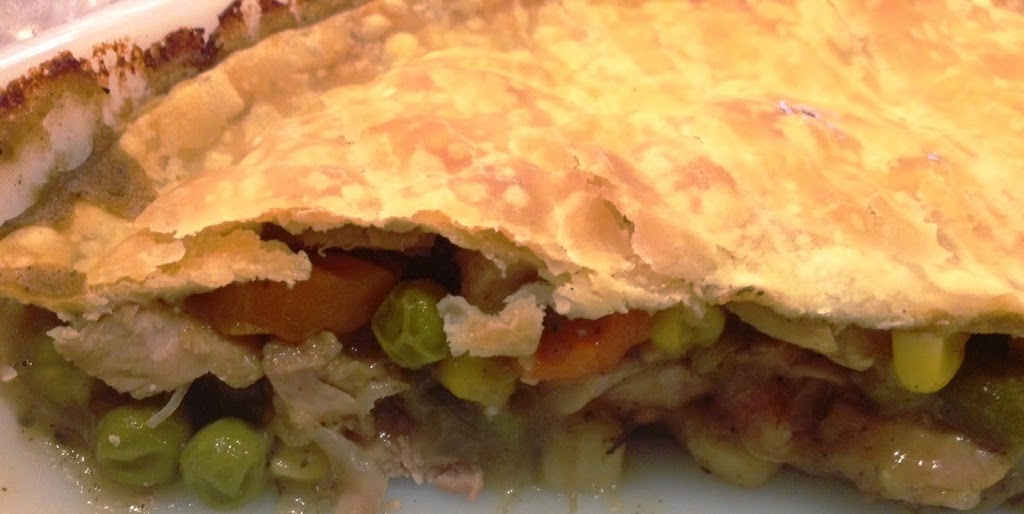
Chicken Pot Pie

Chicken Pot Pie
Serve 6 (8 ounces per portion)

1 tsp olive oil
1/2 cup onion, diced
2-4 cloves garlic, minced
12 ounces cooked boneless/skinless chicken, diced
1 can (approximately 12 ounces) cream of chicken soup (you can also use cream of celery or mushroom)
1/2 cup wine (your choice, I used a sweet Marsala for this)
12 ounces frozen mixes vegetables, thawed
1 prepared pie cust (homemade or store bought)

Preheat oven to 400F.
Heat large non-stick skillet over med-high heat.
Add oil, onion and garlic. Saute for 2-3 minutes.
Add diced chicken. Saute for another 2-3 minutes.
Add soup and wine. Mix together.
Add vegetable. Reduce heat and let it simmer. Everything should be hot when you out this in the oven.
Spray a 9″ round baker (or 8X8 square) with cooking spray.
When the oven is ready, pour chicken/veggie mixture into dish.

Carefully lay pie crust over the top. Trim edges. Cut two slits into the crust, to allow steam to escape.

Bake for 8-12 minutes, or until the crust browns.

Serve immediately, or the next day.
Nutritional data:
Calories:         305
Fat:                 11.1g
Sat fat:              3.1g
Chol:            62.6mg
Sodium:     269.1mg
Carbs:             13.3g
Fiber:                1.5g
Protein:           11.9g

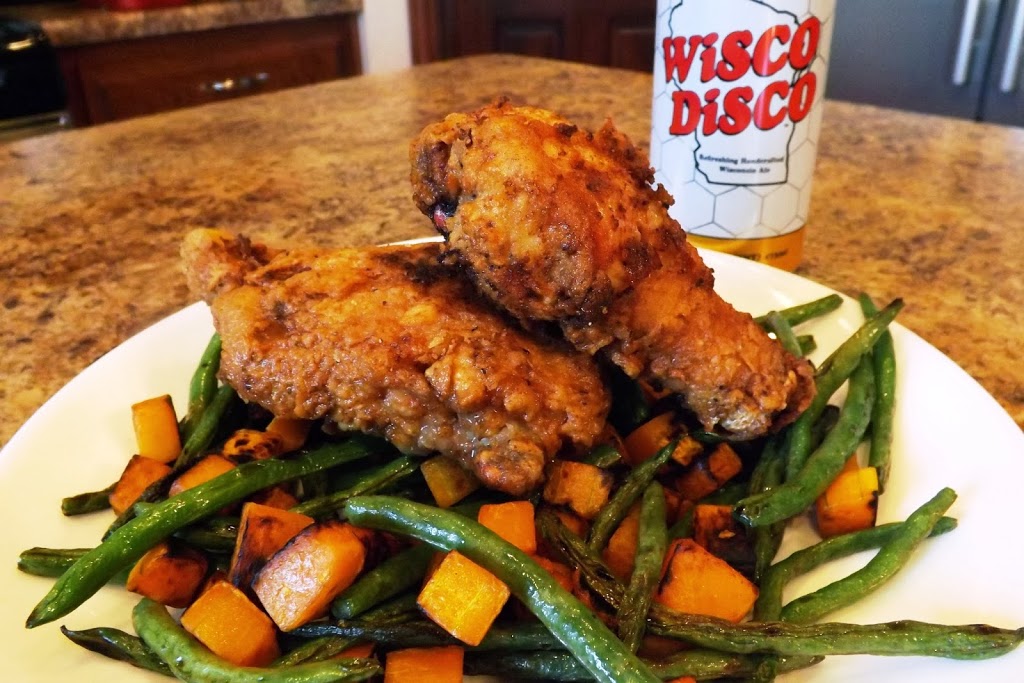
Fried Chicken with Sauteed Green Beans and Squash

Buttermilk Breaded Fried Chicken 
6 pieces
I have NEVER deep fried chicken at home before, only when I worked at a fast food restaurant 26 years ago. I don’t know why I have never done it. I will certainly do it again, because that chicken was incredible. The coating was crisp and crunchy, but it did not all fall off with the first bite and the meat was tender and juicy.
6 pieces of chicken (I used skin-on thighs and drumsticks)
1 cup buttermilk (I used low fat version) 
1 egg
1 cup whole wheat flour 
1 tablespoon corn starch (increases the crispiness of the breading)
Seasoning of choice (I used garlic and onion powder, and black pepper)
Oil for frying
  1. Season the chicken and let sit in the refrigerator for 1-2 hours.
  2. Pour buttermilk into medium bowl and add egg. Whisk together.
  3. Put flour, corn starch and seasoning into a shallow dish.
  4. With your left hand, pick up one piece of chicken and coat with buttermilk mix. Lay it on the flour.
  5. With your right hand, toss the chicken until it is completely coated with flour mix. Remove to a clean plate. (I really don’t care which hand dips into the buttermilk and which does the flour, but if you keep your hands separate, it won’t be a messy.)
  6. Preheat the oil in a deep kettle or stock pot. I used a large cast iron Dutch oven outside on the side burner of my grill. You want the oil to be 375F. If you have one, use a thermometer. How much oil depends on the size of the pan, but you need at least an inch of oil.
  7. When it is hot, carefully place 3-4 pieces into the oil, or as many that will fit leaving room between them.
  8. Turn them when they begin to get golden brown (3-5 minutes). Let the second side cook an equivalent time and remove to a cooling rack to let excess oil drip off.
  9. Serve! It goes well with a full bodied beer.
    The side dish is simply a butternut squash, peeled and cubed, with fresh green bean. I sauteed the squash in a tablespoon oil tossing frequently until just starting to get brown. Then I added the green beans (I didn’t measure or weight. Use at many as you want.) Again, toss frequently, and serve when the beans are hot.
    Nutritional data: per piece of chicken, with the skin on
    Calories:         270
    Fat:              16.5g
    Sat fat:           2.6g
    Chol:       115.6mg
    Sodium:       96mg
    Carbs:           7.7g
    Fiber:            0.5g
    Protein:          22g
    Note: Use that nutritional data with a “grain of salt.” Every piece of chicken can be a different size. If you remove the skin before eating, you will get less fat and cholesterol. If you use a salted spice, you will have more sodium. This recipe is more about how to do it, rather than about the exact end result.

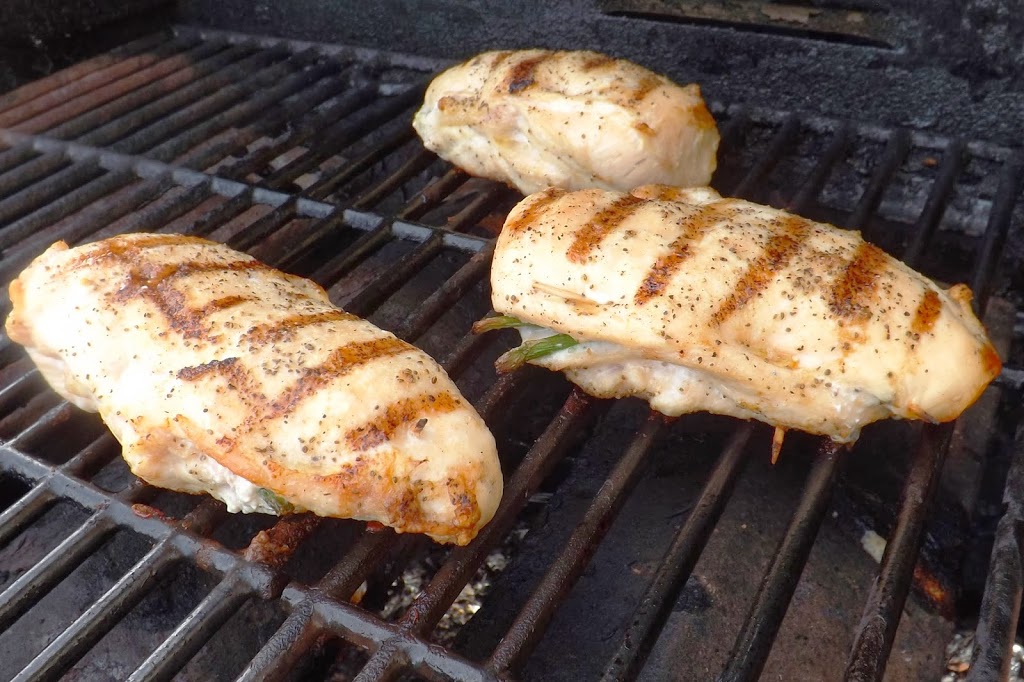
Asparagus and Bleu Cheese Stuffed Chicken Breasts


Asparagus and Bleu Cheese Stuffed Grilled Chicken Breast
Serves 4

4 chicken breasts, boneless and skinless (approximately 6 ounces each)
1 cup asparagus, cut into 1 inch lengths
1 ounce bleu cheese
1 ounce cream cheese
1/2 tablespoon olive oil
Spices and herbs of your choice (I used Penzey’s Greek Seasoning)

  1. Preheat your grill on high.
  2. Carefully cut into the side of the chicken breast, making a pocket. Do not cut all the way through.
  3. Combine the cheeses and herbs.
  4. Spread 1/4 of the cheese mixture in each pocket. 
  5. Fill the pockets with the asparagus.
  6. Use a toothpick to keep the pocket closed.
  7. Rub the chicken with the olive oil.
  8. Clean the grill’s grates with your grill brush. With additional cooking oil, a paper towel and long tongs, rub oil on the grates.
  9. Lay the chicken on your prepared grill.
  10. Let cook for 4-5 minutes, then flip and grill another 4-5 minutes.
Nutritional data:
Calories:      290
Fat:             12g
Sat fat:       4.9g
Chol:      109mg
Sodium:  176mg
Carbs:        2.3g
Fiber:         0.7g
Protein:    41.9g

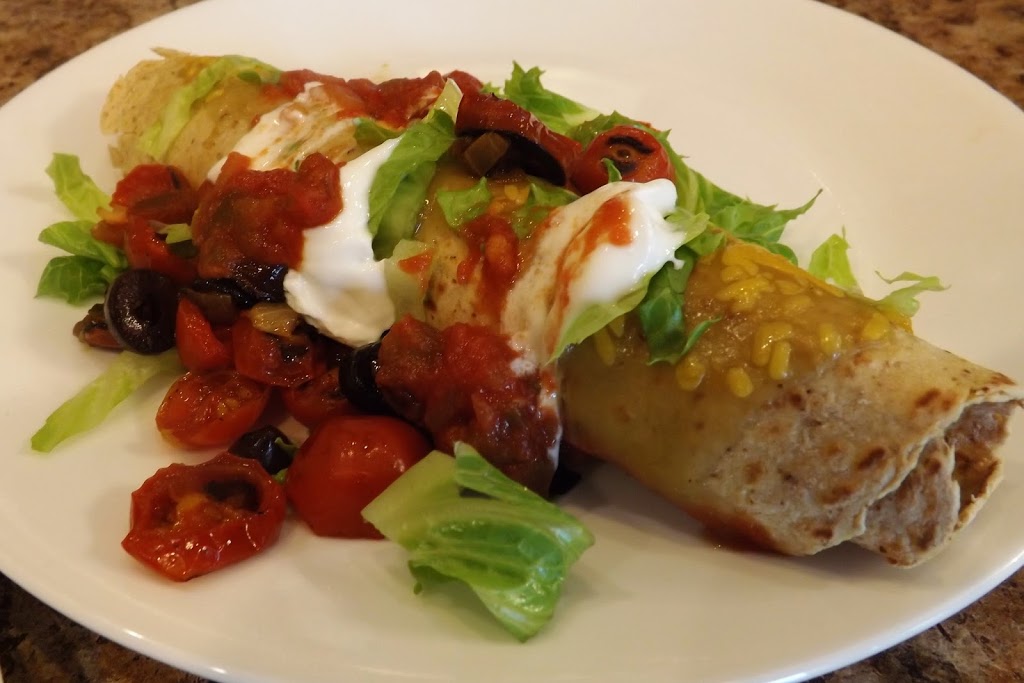
Chicken Enchiladas

These may not be 100% authentic, but they are fast, easy, healthy and most of all, delicious!

My Simple Chicken Enchiladas
Serves 7-8 (one piece)

8 ounces cooked chicken, shredded
1/4 cup black olives
1/2 cup cheddar cheese (divided)
2 ounces soft goat cheese
1/4 cup onion, minced
1/2 – 1 cup fresh cilantro, chopped
8 soft tortillas (6-8″)
1/2 cup salsa (divided), red or green.

  1. Preheat oven to 350.
  2. In a medium bowl, mix together chicken, olives, 1/4 cup cheddar cheese, the goat cheese, onion and cilantro.
  3. Spray a 9×13 baking pan with cooking spray.
  4. Spread 1/4 cup salsa on the bottom of the pan.
  5. Taking a tortilla, scoop 1/8 of the mix, place on the tortilla and roll as in the above picture. Place in the baking pan.
  6. Repeat with all tortillas.
  7. Spread remaining salsa on the top of the tortillas. Top with the remaining cheese.
  8. Bake for 16-18 minutes, or until the cheese begin to brown.
  9. Serve with shredded lettuce, tomatoes and sour cream (or Greek yogurt.)
Due to poor planning, I only had 8 inch tortillas, so the nutritional data will reflect that. I think it would have been better with 6 inch tortillas, and would have obviously had fewer calories. But sometimes you need to work with what you have.

This is another great way to use “chicken over-production” (aka “left-overs.”) You could also replace the chicken with ground beef, or shredded beef, pulled pork, or even fish (tilapia, whitefish, flounder.) Or replace the meat with beans. The key to making this easy is to use what you have on hand, and when you use precooked meat, all you are doing is reheating it. You could even make these, wrap them tightly and freeze them individually for later use, and just thaw and heat in the microwave. (If you do that, don’t top with the sauce and cheese until you are ready to heat them.)

Nutritional data:
Calories (per piece): 179
Fat:                         10.2g
Sat fat:                      3.4g
Chol:                    31.5mg
Sodium:              641.4mg
Carbs:                     19.3g
Fiber:                      12.2g
Protein:                   15.5g
The high sodium level is due to almost everything about this recipe: the tortillas, the salsa, the cheese, the olives. And once in a while, I am okay with that, because this is such a good meal.

Here is a quick question for any beer drinkers out there: 
If I were making this for you, which beer would you most want me to serve with it, and why that beer?

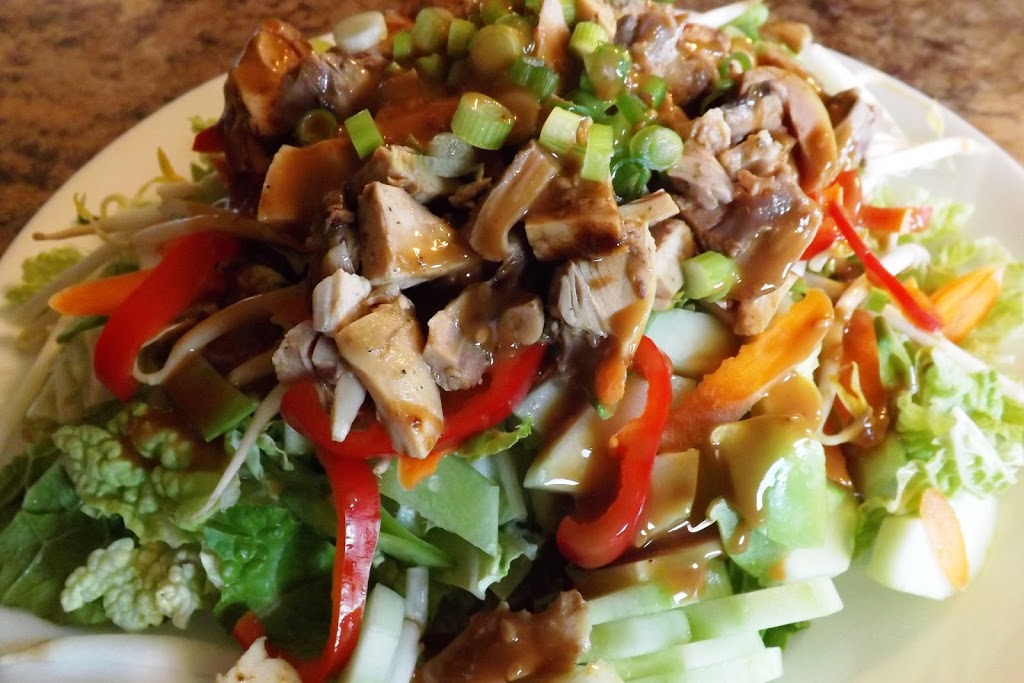
Asian Chicken Salad

Asian Chicken Salad
Serves 2

Remember Last Friday’s recipe? The Grilled Chicken and the Hoisin BBQ sauce?

Well, this recipe uses 2 left over chicken quarters and the remaining Hoisin BBQ sauce.

Skin the chicken and remove the bones. Roughly chop the chicken. Pour the BBQ sauce over the chicken and stir to coat. Warm in the microwave until it reaches the temperature you want.

Make a salad on a base of thinly sliced Napa cabbage (yes, the same as in the Kimchi recipe.) On the bed of Napa, add your preferred vegetables:

  • Peeled, seeded and chopped cucumber
  • Shredded carrots
  • Chopped bell pepper
  • Onion (white or green)
  • Chiles
  • Snow pea pods
  • Mushrooms
  • Bean sprouts
  • Bamboo shoots
  • Water Chestnuts
Think of your favorite Asian dish. If you liked the veggies in it, you will like it on the salad.
Top your veggies with half of the chicken/BBQ mix. If you want more dressing, you can use your favorite Asian-style salad dressing, or simply make more of the BBQ sauce.

Since the calories and other nutritional data will vary based on what you choose and the quantities used, I am not going to give any nutritional data. Like any salad, the calories are concentrated in the dressing. Use as little as you can get away with, and you will have an full-flavored, low calorie meal, that uses up leftover chicken in a way that maybe you never considered.

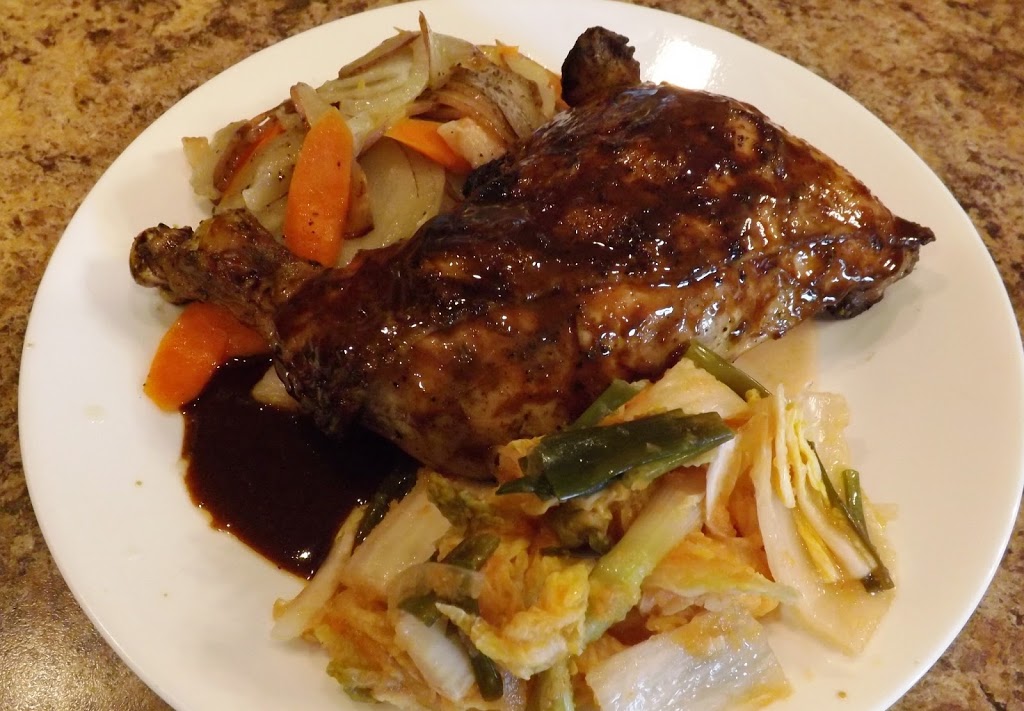
Hoisin BBQ Chicken Quarter, with Grilled Potatoes and Home Made Kimchi

Hoisin BBQ Chicken Quarter, with Grilled Potatoes and Home Made Kimchi
Serves 2

(There are many steps, but nothing is difficult.)

Hoisin BBQ Chicken
4 chicken leg quarters
Chinese Five Spice Powder
Vegetable oil for the grill

Mix together and set aside:
2 teaspoon commercially prepared Hoisin sauce
2 tablespoon sesame oil
2 tablespoon rice wine vinegar
1 teaspoon fresh minced and mashed ginger
1 clove garlic, minced and mashed

Grilled Potatoes
1 medium potato, sliced thinly
1/4 small onion, sliced thinly
2 medium carrot, peeled and sliced thinly
2 strip raw bacon, chopped
2 sheets aluminum foil each about 18 inches long
Cooking spray

Kimchi (this is a more complex–but not difficult–recipe and I will make that a separate posting)

  1. Preheat the grill on high for at least 5 minutes. Make sure that about 1/3 of your grill is only warm, to make a safe zone. (If you have a three burner gas grill, set two on high and one on low. If you have a two burner, one is high and one low. Charcoal? Most of the coals are under 2/3 of the grill and only a a couple are under the remaining 1/3.)
  2. While the grill is preheating, sprinkle the Chinese Five Spice powder on the chicken.
  3. Spray one sheet of aluminum with cooking spray.
  4. Place 1/3 of the potatoes on the sheet.
  5. Add in layers, half the bacon, half the onion and half the carrot. Season with black pepper.)
  6. Add another 1/3 of the potatoes.
  7. Add, in order, the remaining carrots, onions, bacon and potatoes. (The packet will be the same upside down or right side up.)
  8. Carefully bring the top and bottom edges of the foil together over the veggies and fold the edges together to seal. Then tightly roll the right and left edges.
  9. Place that packet on the second sheet of foil, seam side down, and repeat step 8.
  10. Note: I just saw that they now sell aluminum foil bags which would greatly simplify this part of the meal.
  11. Using tongs and a paper towel, wipe the vegetable oil on your freshly brushed grill to help prevent the chicken from sticking.
  12. Lay the chicken, skin side down, over the direct heat. Place the veggie packets near the chicken, on the edge of the hot and safe zones.
  13. Turn the chicken after 5 minutes, or if the flames of hell start to flare up.
  14. When both sides are browned (10-12 minutes) move the chicken to the safe zone. Let if cook, undisturbed, until it has an internal temperature of at least 165, but with legs and thighs, you can even go to 170 without drying the meat.  This will take 30-4 minutes.  If you don’t have a thermometer, use  a meat fork or a skewer, and pierce the thigh in the deepest part. Pull it out. If the juices are red, it is still raw. If they are clear, it is done. 
  15. Turn the potato packets 1/4 turn (flat, right edge, upside down, left edge, flat) every 10 minutes. Remove 40 minutes after putting on the grill.
  16. Remove the chicken when done and immediately brush the Hoisin BBQ sauce over it. I don’t brush this on while the chicken is still on the grill, because I don’t want it to burn, or all run off and fall into the grill.
  17. Let the veggie packets and chicken rest for 5 minutes, then serve.
Nutritional data:
Chicken (an average leg/thigh quarter will yield about 4 ounces of meat)
Calories:     210
Fat:             15g
Sat fat:        4.5g
Chol:        90mg
Sodium:  150mg
Carbs:           0g
Fiber:            0g
Protein:       19g
Hoisin BBQ Sauce (less than 1 tablespoon of the sauce–save the remaining sauce covered in the refrigerator)

Calories:       67
Fat:            6.9g
Sat fat:          1g
Chol:          0mg
Sodium:    34mg
Carbs:        2.5g
Fiber:            0g
Protein:      0.3g
Grilled Potato (half the packet):

Calories:       136
Fat:             3.7g
Sat fat:        1.3g
Chol:        9.5mg
Sodium:   133mg
Carbs:       22.1g
Fiber:             3g
Protein:          5g
In the next couple days, I will show you how to make an Asian Chicken Salad, using the leftover chicken and Hoisin BBQ Sauce.