What’s Old is Not Necessarily Obsolete (Part 2)

In the early 1900s a scientist (Wilber Atwater) discovered that burning a food will release energy. This energy is measured in units called–surprise!–calories. (I am not going to get too deep into this, and the fact that a scientific calorie is not the calorie that we count. We are actually counting kilocalories, or kCal. Whenever I refer to calories, I mean the calories that we count in food, the stuff on the food labels.)

But this is when food began to turn from the idea of pure sustenance into sources of energy. And further research showed that carbohydrates–all of them–release 4 calories per gram. Proteins also contain the same amount of energy, 4 calories per gram. Fats are huge energy stores, with 9 calories per gram. Alcohol is almost as energetic as fat, with 7 calories per gram. (This gives another reason why excessive alcohol consumption have be problematic.)

This is the basis of calorie counting.

I think back to my childhood in the late 1960s. I can remember watching my parents sit at the kitchen table after dinner with their notebook and a reference book, listing everything they ate and adding up the calories. This was about the same time that Weight Watchers began to grow. In the 1970s, other services arrived, such as Nutrisystem, followed by Jenny Craig in the mid-80s. Both were based on buying pre-packaged foods. In personal experience, Nutrisystem’s food was processed, prepared, controlled….and very small. I remember dropping in small bags of rice to rehydrate it before eating and the bags were small. They offered cans of meat pate (okay, it was really paste) the size of a small can of cat food. The size of the can was not the only comparison to cat food (although, to be fair, the BBQ beef version wasn’t bad tasting.)

Those companies continue and others have grown, all offering various levels of pre-packaged food. And they will work. Seriously! If you follow their plan, carefully, you will lose weight. It is expensive, and not exactly eating “clean”, but it will be effective.

It will be effective because it carefully limits your calories. It is calorie counting, but you pay someone else to do the counting for you.

What about other methods that are not calorie counting?  Things like hCG? Medifast? Slim-fast? I remember in the early 80s wanting to lose weight with Dexadrine (before it became the relatively harmless Dexatrim). The pills made me jittery, and if I had followed the “included diet plan” I would have lost weight, because it was a 1200 calorie a day menu plan.They all revolve around one thing: a tightly control caloric intake, with other substances to “enhance” the method.

But guess what? You are still calorie counting.

How about prescription medications? Phen-fen was an appetite suppressant–with some pesky cardiovascular side effects for some people–but it only worked when I ate less. Xenical–later to become the over-the-counter medication Alli–helped block fat absorption. With that medication, you still needed to be careful of your dietary consumption (eat very low fat diet) which simultaneously reduced the gastroinstestinal side effects and reduced your caloric intake.

If you want to change your weight, you have many options, but they all involve eating less and moving more. I just believe that my method, using LoseIt, is very effective. Is it the best? I don’t know. I haven’t tried all of the different methods available. But honestly, I don’t need to keep trying. I already reached my goal using LoseIt’s approach to simple calorie counting and the LoseIt approach has me maintaining my loss for 19+ months. LoseIt is a new company, built on a century-old concept. It–and many other plans–can work, but only if you are careful, persistent, and focused. (And wow–focus was very difficult while taking Dexadrine.)

Next up tomorrow:  Another good recipe! (I’m just not sure which one yet.)
Venison Burgers

Venison Burger
Serves 4 (four ounce patty, raw)

4 buns, lightly buttered
1 pound ground venison (or bison, or very lean beef)
1 tablespoon bacon grease (or coconut oil) plus more to oil the grill.
1 egg white
Salt, pepper, garlic and onion powder, crushed mustard seed
Your preferred toppings

  1. Preheat your grill on high for five minutes
  2. While the grill is preheating, prepare your meat. (Here is the secret:)
  3. Spread the raw meat on a plate. Season as desired. 
  4. Drizzle the oil over the meat.
  5. Gently fold the meat together, and form a well. Add the egg white to the well.
  6. Again, gently fold the meat together, just until the egg white is incorporated. 
  7. Divide into your portions, and form into a ball.
  8. When the grill is hot, brush to remove residue and with a paper towel and tongs, carefully wipe oil on the grill. 
  9. Just before you place the meat on the grill, gently press them flat (but thick) between your hands. 
  10. Press into the center of the burger, not all the way through, but enough to make an indentation in the meat. Lay on grill. Let them grill, undisturbed until the edges of the meat are getting cooked.
  11. Carefully flip.
  12. Continue for 1-4 more minutes (depending on how well-done you prefer.) The indentation you made should have filled in by now. Making that indentation prevent the meat from return to a more rounded shape.
  13. In the last minute, lay the buns on grill. Watch carefully, they will go from untoasted to burnt quickly.
  14. Top and serve immediately.
Nutritional data for the patty alone (too much variability in different buns and toppings):
Calories:     193
Fat:            9.6g
Sat fat        4.6g
Chol:     89.5mg
Sodium: 93.3mg
Carb             0g
Fiber:            0g
Protein:    24.4g
The added oil in step 4 will help keep the burger moist. You can use different oils for different flavor. Bacon grease is excellent. You could use butter or lard if you wanted. 
If you use a lower grade of beef (anything less than 90% lean), you won’t need to add the oils. So why don’t I just buy the inexpensive meat? My brother-in-law gives me the venison, so I use what I have, and adapt as needed.
Never press on a burger while it is cooking, whether on a grill or in a pan. That simply pushes the juices out and you will have a dry burger.
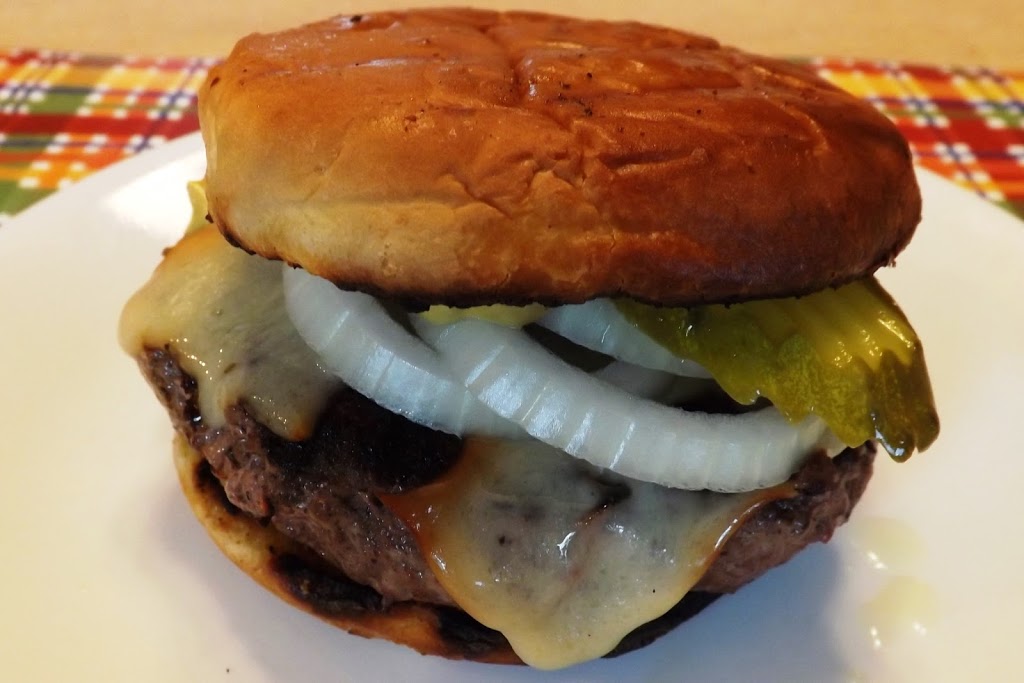
I’m not going to list all possible toppings, but let me say that Jimmy Buffet has it close. Cheese, onion, pickle and mustard is all it takes! (“With a cold draught beer” of course!)

What’s Old is Not Necessarily Obsolete (part 1)

There are cycles to almost everything. Think about fashion (although, thankfully men’s polyester leisure suits were a “one hit blunder”) and hairstyles. Skirt lengths go up and down, colors shift from earth tones to primary colors, hair goes from straight to wavy and back again, and men’s ties and lapels get narrow and wide and then narrow again over time.

Right now in home decor, retro is big (think the TV show “Mad Men“) and if you were in our house, you would see that our decor is morphing into that rather rapidly.

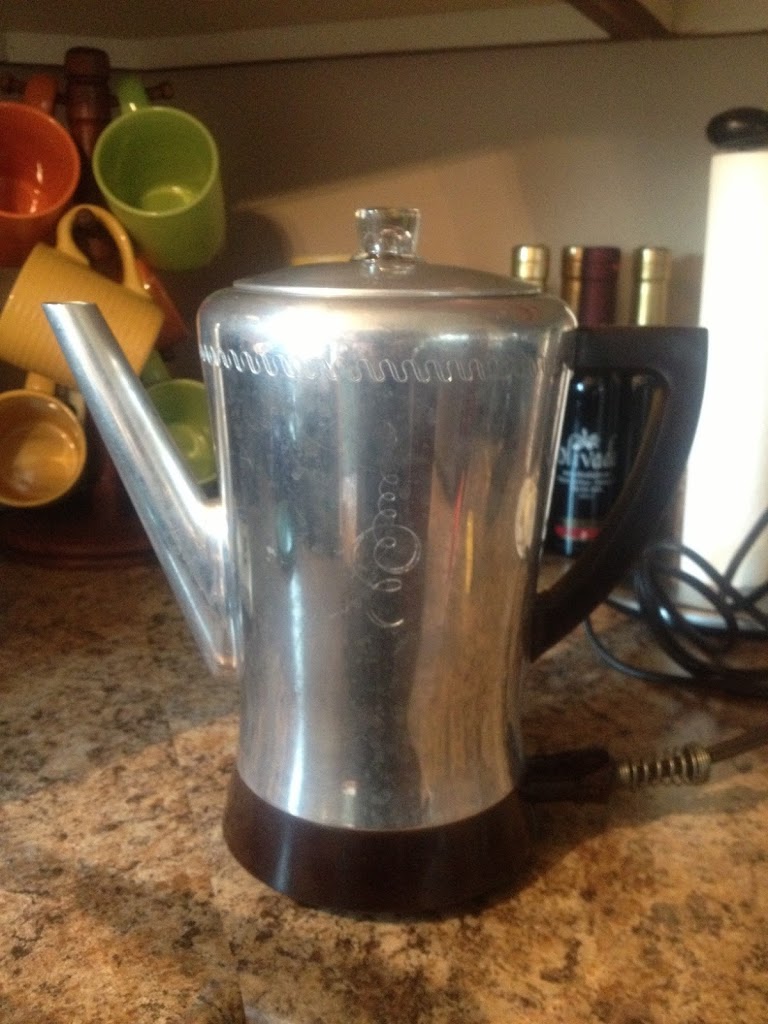
Here is how I make my morning coffee now. 
I gave up using my automatic drip maker in favor of a 1960’s percolator. 
Hotter coffee with more flavor!
Our 1962 Magnavox Astro-Sonic Stereo. This is 60″ of awesomeness and it plays our LPs perfectly.
(The Beach Boys “Endless Summer” is on display.)

Car makers try do it. Chrysler’s PT Cruise and Chevy’s HHR were attempts to bring back the feel of a 1930’s street rod, although here is evidence that not every fashion retread–get the pun?–is successful. I’m still waiting for the 1957 Cheny fins to return!

Even ideas are almost never new. I teach a class called “Learning Strategies for Nursing Students”, and I focus on simple methods to improve study efficiency. Using “brain based” and multiple intelligence theories, I teach students that studying will be more effective if they schedule study time each day and then when their “study appointment” is due, they should focus on nothing but studying. They should also employ multiple learning paths (reading, speaking, writing summaries and paraphrasing), review and renew information, using imagery to build more relevant memories, among other techniques. These ideas are based on recent studies (from the 1980s to present day) and my students report success.

Imagine my surprise when I was at a thrift store yesterday and found this book:

Published in 1915.
Page 21 
Exactly what I teach during the first lecture on day 1.

“Out of fashion” might accurately be rephrased as “not back in fashion yet”.

Next, read about another old-fashioned idea that is still here and still works. (If you’ve read my blog before, there is no surprise that I am talking about calorie counting.)

And watch for another recipe. (I’m not sure which one–but it will be something good!)

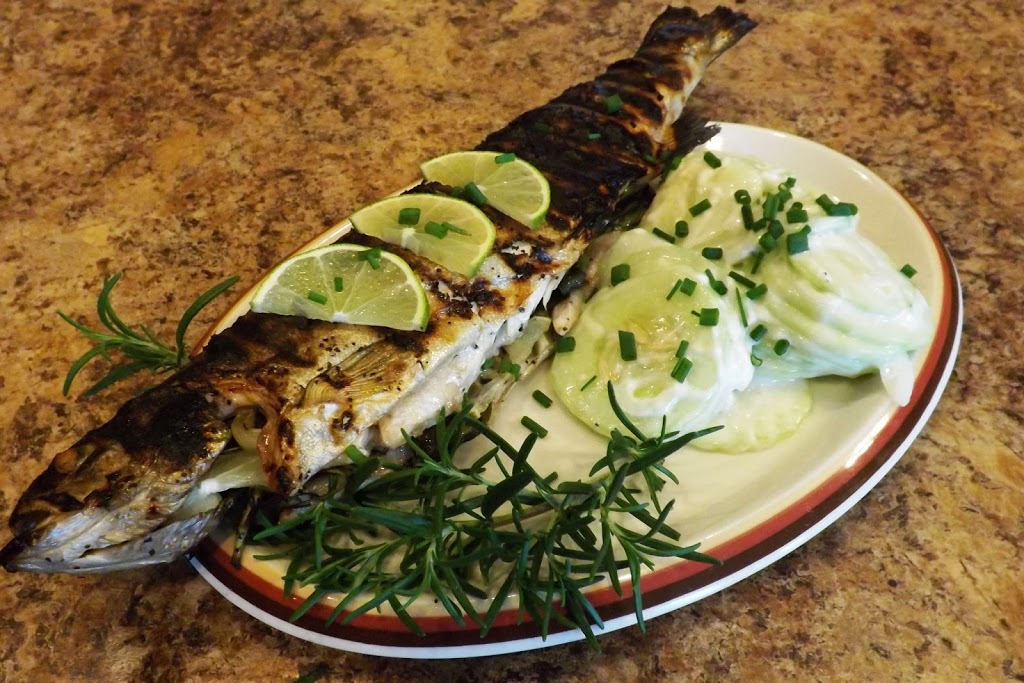
Grilled Stuffed Lake Trout


Grilled Stuffed Lake Trout (served with a Creamy Cucumber Salad)
Serves 2-4

2 whole trout, cleaned (each about 12-16 ounces)
Fresh herbs

  1. Preheat your grill for 5 minutes on high heat.  Use a wire brush to remove any previous residue.
  2. Prepare your fish. I used fresh sprigs of rosemary and fresh basil in the abdominal cavity, with some sliced onion and lime. (I didn’t have any lemon.) You could also simply sprinkle salt and pepper and any other seasoning in the cavity. I also sprinkled black pepper on the skin (but I don’t think that added anything to the finished meal.)
  1. Turn the heat to low and carefully dip a paper towel in cooking oil (any kind) and with a pair of tongs, wipe the oil on the grill. Repeat that 2-3 times, because you really don’t want the fish to stick to the grill.
  2. Turn the heat back to medium-high.
  3. Lay the fish on the grill. Let it cook until the skin begins to brown (mine got a little too dark, but it didn’t make any difference in flavor, only appearance.) This will take 3-5 minutes.

  1. Turn the fish over for another 3-5 minutes.
  2. Remove from the grill. Let cool for a few minutes so it is easier to handle.
  3. With a sharp knife, I cut the head and tails off, and then peel the skin off from one side (see why it doesn’t matter it the skin gets charred?)
  4. After the skin is off, place the edge of the blade along the spine (parallel to the spine) and ease it into the flesh. Gently pull toward you and the flesh will come off in large pieces.
  5. After you have the flesh off that side, beginning at the tail, pick up the spine and lift it off. The should remove almost all bones from the fish (but be careful, some can be stubborn.)
The flesh was lightly flavored with rosemary and basil. I served it with fresh lime and that was it. No need for any sauce or butter. Fresh trout is delicious!
Note: I bought two 12 ounce trout which yielded a total of 14 ounces of meat after you remove the head, tail, skin and bones. This recipe can be adapted to any fatty fish that you may have available in your region. ALWAYS try to find fresh fish. Before I buy a whole fresh fish, I ask to smell it. If it smells fishy, it will taste even more fishy, because it is already a few days old. The eyes should also be clear and shiny, not dull and hazy. (If you look at the pictures of the uncooked fish, you can see the shiny eyes.) My fish had no fishy aroma, and had been caught and delivered the morning I bought them.
Nutritional data (per 6 ounces of boneless/skinless flesh):
Calories:    323
Fat:          14.4g
Sat fat:       2.5g
Chol:       126mg
Sodium:  114mg
Carbs:          0g
Fiber:           0g
Protein:   45.3g
Creamy Cucumber Salad
Serves 8 (5 ounces by weight)
4 medium cucumbers, peeled and thinly sliced
1/4 small onion, peeled and thinly sliced
1/4 cup mayonnaise (I use the full fat version)
1/4 cup Miracle Whip (I use the light version)
Black pepper to taste
Dill weed to taste (optional)
  1. Combine ingredients. Refrigerate until cold. Overnight is better for more flavor.

Nutritional data (per 5 ounces by weight):
Calories:      67
Fat:             5.1g
Sat fat:        0.8g
Chol:           59mg
Sodium:    159mg
Carbs:        4.6g
Fiber:         0.8g
Protein:      0.7g

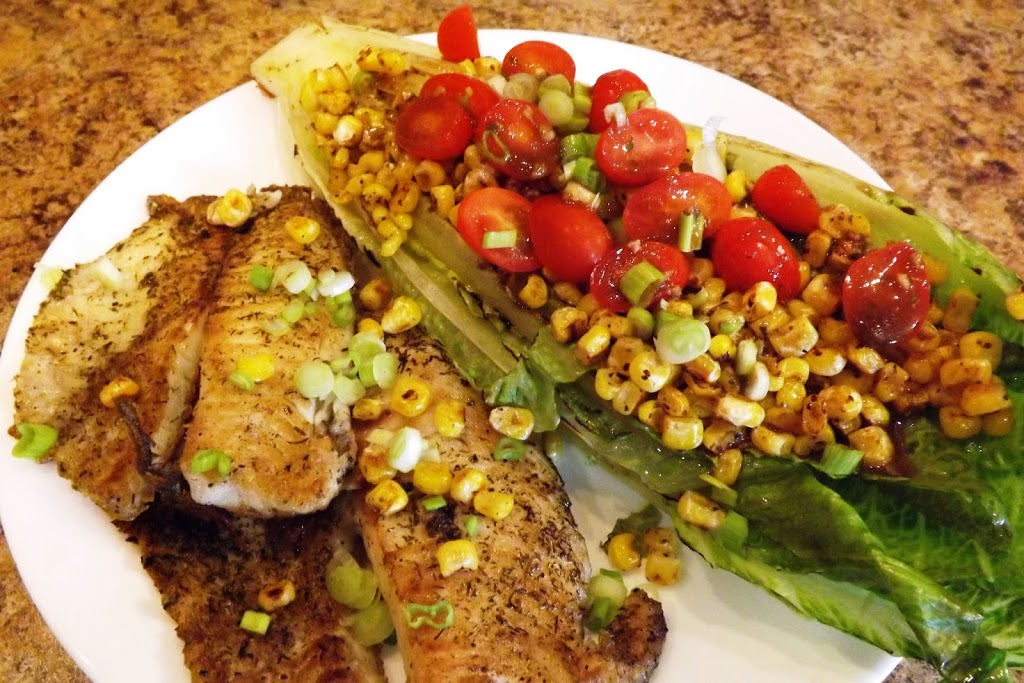
Grilled Romaine Salad with Tomatoes and Grilled Corn

Grilled Romaine Salad with Tomatoes and Grilled Corn
Serves 2

1 heart of romaine, halved
2 ears of corn (or 1 cup frozen corn kernels)
10-12 grape tomatoes, halved
2 green onions (scallions) chopped, whites and greens
1/4 cup your preferred vinaigrette (I used the following recipe, mixed together in a jar and vigorously shaken):
           2 tablespoons olive oil
           2 tablespoons balsamic vinegar
           1 teaspoon dried herbs mixture (I used Penzey’s Tuscan Sunset.)
           1 teaspoon Dijon mustard

  1. Place the ears of corn on the grill (I prefer husks on.) Grill over direct heat until the husks are charred and the kernels are beginning to caramelize. This will take 20-30 minutes. (Keep close by the grill with a spray bottle of water unless enjoy fire.) When caramelized, remove the ears from the grill, shuck the remaining husks, and cut kernels from the ear. OR  Heat a non-stick skillet with a bit of olive oil. Place frozen kernels in skillet and saute over med-high heat until kernels caramelize. then remove from heat and cover to keep warm.
  2. Combine prepared corn and tomatoes and cover to keep warm.
  3. Brush a small amount of the vinaigrette on the cut surface of the romaine. Reserve the rest.
  4. Place the romaine on the hot grill, cut side down. Grill until slightly charred and beginning to wilt (2-3 minutes.)
  5. Place each romaine on a plate, divide corn and tomato mixture on each, and top with remaining vinaigrette. Sprinkle green onions and serve.
Nutritional data (per half):
Calories:        294
Fat:               15.2g
Sat fat:               2g
Chol:                 0mg
Sodium:           22mg
Carbs:          39.6g
Fiber:             6.5g
Protein:          6.2g
(The picture above also shows pan fried tilapia fillets.)

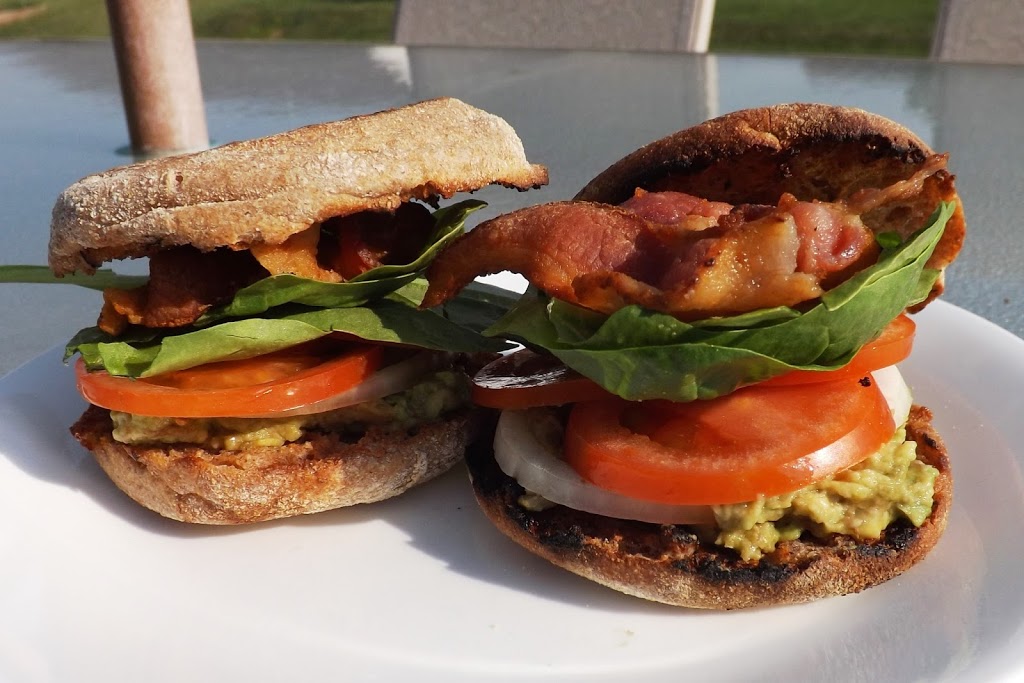
An updated BLT

An Updated BLT
(The recipe below is for two sandwiches, but the nutritional data is for one sandwich.)
2 English muffins (I prefer Healthy Life 100% Whole Wheat, for their flavor and only 60mg of sodium per muffin.) 
1/4 ripe avocado, mashed
2 strips bacon (preferably low sodium)
2-4 slices of tomato 
Onions as desired
Fresh baby spinach
  1. Fry your  bacon, and drain on plate covered with paper plate and paper towels. (You can save any residual bacon grease for later cooking or throw it out. I save mine.) Note: I have been having issues with out home smoke detectors lately, so I fry my bacon on my gas grill outside, laying them on a cast iron griddle. Works great, and no loud alarms!)
  2. Toast your muffins, or I lightly butter them and lay them on the gas grill for few minutes.)
  3. Spread half the mashed avocado on each muffin and layer the other ingredients. One slice of bacon torn in half is all that is needed on each sandwich for great flavor.
That’s it. Simple as can be, and much healthier (in this case, especially in regards to the sodium content.) More importantly, this is a delicious sandwich and really quick to make.
Nutritional data (per sandwich):
Calories:     183
Fat:             6.7g
Sat fat:        1.6g
Chol:          7.5mg
Sodium:  161.3mg
Carbs:       22.5g
Fiber:             4g
Protein:       8.6g

To understand why this version is healthier, if you used Healthy Life 100% whole wheat bread, 2 tablespoons low fat mayonnaise, and 3 strips of regular bacon the numbers would be:
Nutritional data (per sandwich):
Calories:       237 (not bad)
Fat:               12.6g 
Sat fat:            3.3g
Chol:            26.4mg
Sodium:      1027mg  (Ouch!)
Carbs:          21.5g (the same)
Fiber:             5.7g  (better)
Protein:        13.3g  (more)
If you are not worried about sodium, the regular version is fine. But the updated version is 50 calories and 960 mg sodium less, and that can make a difference. 

Last Night’s Birthday Dinner!

Yesterday was a great day! In addition to restarting the blog, I enjoyed a fantastic dinner at the Republic Chophouse, in downtown Green Bay. We’ve never eaten there before, but this won’t be the last time!

To make everyone drool just a little, here are the meals (sorry, no pictures):

Starters:  Bennett and Tammy enjoyed the bacon-wrapped scallops in a maple-jack glaze, Ethan had steak bites (bites of New York strip, wrapped in prosciutto, seared and served with garlic aioli, and I had chile-lime raw ahi tuna taco on Napa cabbage, avocado and habanero-sour cream.  Oh, that was good! I am going to try to replicate that tuna taco. When I do, I will post the results here.

Salad/Soup: Bennett was rogue and enjoyed the tomato-basil bisque while the rest of us had a green salad with a basil vinaigrette.

Main Course:  Ethan enjoyed citrus-cucumber salmon and garlic-cheese mashed potatoes. Bennett and Tammy loved the Ritz Cracker crusted rack of lamb (four bones) with a blackberry-veal demi-glace. Bennett also chose the garlic-cheese mashed, and Tammy went with grilled asparagus. And I…well, I went for the gold ring. I enjoyed a 16 ounce Irish New Yorker (an inch-thick boneless New York strip steak, marinated in Guinness stout, whiskey, and soy sauce, grilled medium rare, and served with truffle-Parmesan steak fries. It also came with a Jameson’s Irish whiskey shooter which I saved for the after dinner coffee.)

Dessert: Both boys went with the caramelized pineapple custard, and Tammy got the spiced rum cake with port-wine poached pears, and I ordered the HUGE four-layer red velvet cake. Tammy and I were going to share each of ours, but the red velvet cake was easily large enough for four, and the rum cake was nearly that large. We ate the spiced rum cake and brought the red velvet cake home. It sits in our fridge, taunting us.

Oh, yeah…I completely blew my calorie budget, and I didn’t care. You only turn 50 once, and this was a special meal.

Today, I am back on track (and only up 1.5 pounds, which I consider a victory because I planned for a two pound gain–sodium/water retention.)
If you are in Green Bay between now and July 18, you can enjoy Green Bay Restaurant Week, too. The meals are awesome (as are the prices.)  If you can’t make it to Green Bay, well I guess my summaries will need to suffice. Tammy and I have two more meals (lunches, this time) planned at two other restaurants.  Keep watching here for details.

I’m Back!

Wow. It has been six months since I last posted here. Do I have any excuses–or more charitably, any reasons–for my absence? Yes. Are they valid? Maybe, maybe not. But they don’t really matter. The past is gone. If we dwell on the negative, the “I wish…” we will gain nothing. If we learn from our actions, and make new choices going forward, then we ultimately win and can grow beyond what we were.

I choose to win!

So, I am back! And this time, I am here to stay! (More on that later.)

There have been a few major family events. Our oldest son is now 21, and although still in college, has moved out for this summer to work as a research assistant for his professor and then will spend 17 weeks studying at the University of Amman, Jordan. He is almost out of the nest. Our youngest son just turned 18 and he is feverishly looking for an apartment so that he, too, can spread his wings. Our only other “child”, Ozzy, will turn 7 in August and he is still playful, fun and shows no signs of wanting to move away. Especially since we are so good at filling his food bowl.

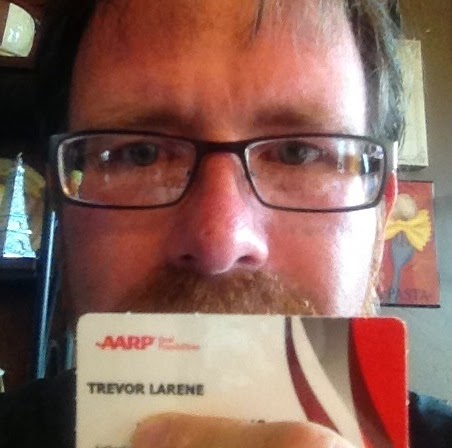
And I am officially a member of AARP. Oh, this not based on employment status–I figure I will be working until 80 or more. But today I turned 50 years old.  Last night, my son asked me, “You’re going to be 50. How does that feel?” I chuckled and said, “Well, it is a combination of ‘how can I be that old when I feel this young’ and “how the heck can I be that old?!?!?!”

But 50 is just a number and numbers are only relevant when you understand the context. In my context, “50” means I will get a discount when my wife and I stay in hotels on vacation. Nothing else changes. Here are two other numbers, that mean nothing out of context: 87 and 19. But here are the defining labels: 87 pounds lost, and 19 months maintaining that weight loss level.

What does all this mean? Well, I think that right now, today, with this birthday, I am starting the second half of my life and regaining my focus. I always enjoyed writing these blog posts. They helped me stay on track, to organize my thoughts, and to iron out details that seem elusive when just thinking about them. So the blog begins again, anew.

As before, this will be a combination of recipes from my kitchen with pictures that I have taken, discussions of travels we take and restaurants where we eat, and as Tammy describes them, “blah-blah” posts, where I will try to explain how I accomplished my goal and how I have stayed at (or under) goal. Those ‘blah-blah” posts may be very blunt discussions of what I feel is incorrect information or techniques being used, but they could also be motivational posts to help you find another reason to stick with it. I still use LoseIt and have occasionally posted motivational thoughts there, and this blog will replace that venue.

Lastly, this blog will serve as a precursor to my next project. I think–based on feedback from readers of the blog and LoseIt–that my writing could be compiled into a motivational book. It may even sell copies to people who are not related to me by blood! As of right now, I have about half of the book roughed out (written, but not formatted.) As I go forward, I will complete the writing and properly format it. When it is done, I will first release it here.

I have a lot of recipes to post. I also have pictures. The challenge will be to match the picture with the recipe. But that is my problem. I hope to post at least three recipes a week here. I also look for feedback and ideas. If there is something you would like to see, let me know!

Again, thanks for coming back and feeding these feeble thoughts. It was fun before–it will be even more fun now!

Sauteed Green Beans and Butternut Squash

BLOGGER STILL PREVENTS ME FROM UPLOADING PICTURES.
I will be migrating this blog to a better platform. Soon, hopefully. Please keep coming back to keep updated.

Sauteed Green Beans and Butternut Squash
Serves 4

1 pound fresh or frozen whole green beans (4 cups)
1 medium butternut squash, peeled and cut into 1/4 inch cubes (2 cups)
3 teaspoons olive oil
2 clove garlic, sliced thinly
Salt and/or Pepper

  1. Preheat a 10-11″ non-stick skillet over med-high heat.
  2. Add 1 teaspoon oil. When it is hot, add the squash cubes.
  3. Saute for 4-5 minutes, until the cubes begin to get lightly browned. Remove from the skillet, cover and keep warm.
  4. Add remaining 2 teaspoons oil to skillet. When hot, add green beans.
  5. Toss frequently, until the beans become hot and are beginning to lightly brown (4-5 minutes if fresh, 7-10 minutes if frozen.)
  6. Return the squash to the skillet. Add garlic. Toss together until thoroughly hot (1-3 minutes.) Season with salt/pepper as desired.
  7. Serve.

Nutritional data:
Calories:      64
Fat:            2.5g
Sat fat:       0.4g
Chol:            0mg
Sodium:     6.3mg
Carbs:      10.6g
Fiber:         2.9g
Protein:      1.8g

Beer Braised Pork Chops

BLOGGER WON’T LET ME UPLOAD A PICTURE AT THIS TIME! I have a nice photo of the meal, but Blogger seems to have changed it’s procedures. πŸ™

Beer Braised Pork Chops
Serves 4

2 teaspoon olive oil
4 boneless pork chops (approximately 6 ounces each)
2 Anjou pears, peeled, cored and each cut into 8 wedges
12 ounces beer (it can be a lager or an ale, but NOT a hoppy beer!)
1/4 teaspoon dried sage
Your preferred seasoning (I like Penzey’s Krakow Nights.)

  1. Season pork chops with pepper or your preferred seasoning blend.
  2. Preheat large 10-11″ non-stick skillet over med-high heat.
  3. Add oil.
  4. When oil is hot, place chops in skillet and sear 4 minutes per side, or until lightly browned. Remove to a plate and cover loosely with foil to keep warm.
  5. Add pears to the skillet, cooking about 6 minutes, or until golden. Remove to a plate.
  6. Add beer and sage to the pan. With a plastic or wooden spoon, scrape any caramelized bits from the bottom of the skillet.
  7. Return pork and pears to pan, partially cover the skillet and bring to a simmer.
  8. Keep heat on low and braise 5-7 minutes, or until the pork is heated completely.
  9. Remove pork and pears from skillet, cover to keep warm. Increase heat to medium, and cook about 10 minutes, or until the sauce is reduced by half.

Nutritional data:
Calories:        305
Fat:                8.5g
Sat fat:           2.6g
Chol:            82.5mg
Sodium:         3.5mg
Carbs:          20.9g
Fiber:             3.6g
Protein:        32.3g

I specifically said “NOT a hoppy beer.”  When the beer gets boiled down, all the flavors will become concentrated. If the chosen beer is a hoppy, deliciously bitter ale (such as the classic Sierra Nevada Pale Ale, or Dogfish Head’s 60 Minute IPA) the resulting sauce will be overwhelmingly bitter. Find a soft, mild beer. I used New Glarus Spotted Cow. A German wheat ale (Franziskaner), a malty and fruity Belgian white ale (Hoegaarden) or Ommegang’s Rare Vos would all work very well in this recipe because their flavors would pair well with the pork, the pears and the sage.