Farmer’s Market Grill

Farmer’s Market Grill
Serves ?

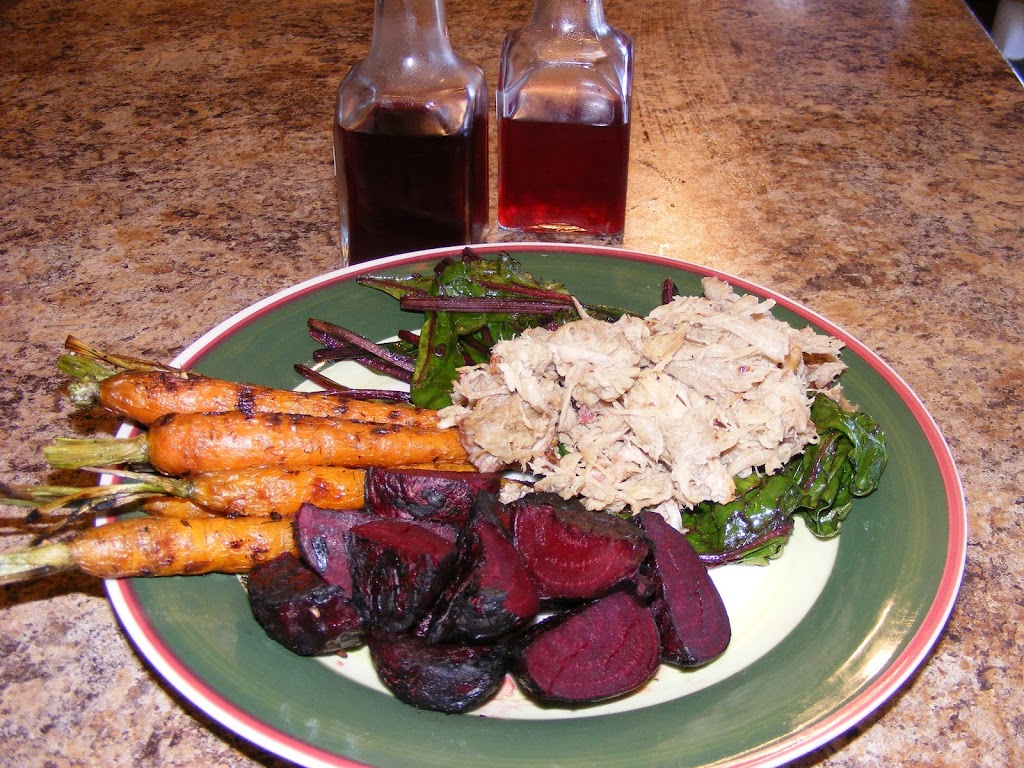
We went to our local farmer’s market to see what fresh veggies were available. I bought some baby beets (about 1 inch in diameter) and small carrots (1/2inch in diameter, 4 inches long).

I washed the veggies, peeled the beets and cut off all the greens, reserving the beet greens. (The carrots had such a soft skin that I didn’t feel they needed to be peeled.) I steamed the carrots in the microwave for 1 minute, and the beets for 4 minutes. Then I place them in separate Ziploc bags. To each bag I added 1 tablespoon olive oil and some spices and herbs. (The carrots got dehydrated onion and garlic flakes, the beets just some fresh cracked black pepper.)

I let them rest for about a half hour and then I got my grill hot. I laid everything on the grill and turned them every few minutes. They took about 15 minutes to cook. I brought them off the grill and let them rest, covered.

I put a non-stick grill on medium high heat and added 1 tablespoon olive oil. When it was hot, I put the washed beet greens in the pan with a little pepper. I sauteed them until the greens began to wilt and removed them to the plate. (The meat was some pulled pork from last Friday.)

I added a few splashes of flavored vinegar. I made blueberry-lemon on a white wine vinegar base, and  blackberry-basil on a red wine vinegar base. The blueberry-lemon was excellent on the beets, and the blackberry-basil really complemented the pork.

I’m not going to give any nutritional data for this meal, because whatever you make will depend on what you can find.

The recipe for the vinegars are simple:

1 cup vinegar (your choice of types, just not white distilled)
1 pint berries, mashed
The zest of a lemon–OR–four fresh basil leaves, torn.

Mix the vinegar, berries and other flavor together in a lidded jar. Shake well and place in the refrigerator for 4-7 days. (Shake once a day.)

When you are ready to use it, strain the juice through a double layer of cheesecloth. Store in the fridge. I’m not sure how long it will last, but in the fridge, I’m guessing it will last quite a while. (Also, I specified a “double layer” of cheesecloth. For the first recipe, I accidentally used four layers, and it took forever to strain.)

These vinegars will have a few more calories than pure vinegar, but I can’t calculate how much. I honestly don’t think it will be enough to worry about.

Other flavor combinations that would taste good:
Mango-chipotle
Orange-cinnamon
Sweet cherry-lime
Raspberry-lemon
Cherry-vanilla
Easy Affogato

Affogato
Serves 2

1 cup cold espresso (or if you don’t have an espresso maker–I don’t–make double-strength coffee)
1 cup reduced fat vanilla ice cream (I used Edy’s Slow Churned Vanilla Bean)
Whipped cream for topping
Baking cocoa–OR–instant coffee for garnish

1.  Place 1/2 cup ice cream in each mug.
2.  Add 1/2 cup coffee.
3.  Top with whipped cream and your preferred garnish.

Nutritional data:
Calories:        148
Fat:                  5g
Sat fat:             4g
Chol:             20mg
Sodium:         45mg
Carbs:         22.5g
Fiber:               0g
Protein:            3g

Those instructions are for a nice cold drink. I think it would be even better with hot espresso poured over the cold ice cream. I will try it that way next time.

And He’s Off!

We just returned home from the airport. Our youngest son is traveling to Shanghai and Beijing, China with the People to People Ambassador program. We’ve been planning this since last September and today is the departure day. For the next 17 days, he will be traveling in China, experiencing places that most of us will only read about.

I’m a little jealous.

But that’s okay, because now my wife and I will finalize plans for our trip to Boston, Maine and the Ohio-Pennsylvania wine counties. We will leave in just a few short days, and drive about 5,000 miles over 12 days of traveling. Along the way, I hope to find some really good food (surprise–it’s all about the food!) and will take pictures of as many meals as possible. I will blog about the food, the experiences and everything else about this vacation. (Hopefully, the blog posts will also include pictures of whales while we are whale watching in Maine, of me fishing for mackerel and the vineyards that we visit.)

Keep watching here for more recipes and details of our adventure!

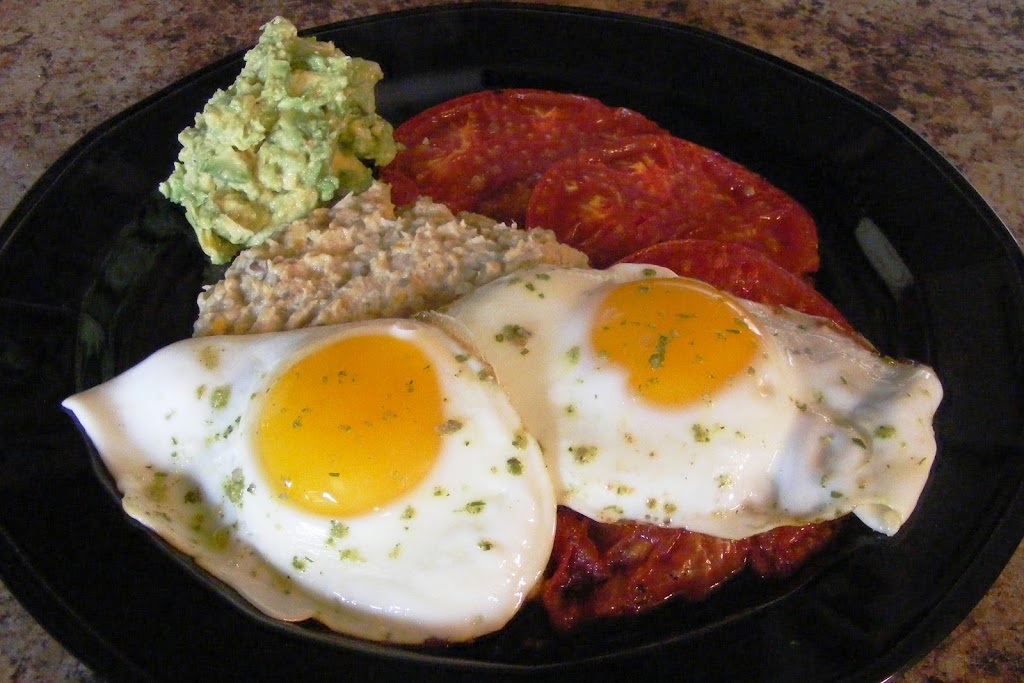
Grilled Tomatoes and Eggs

Grilled Tomato and Eggs
Serves 1 (well, maybe two, if you don’t eat a lot at breakfast)

1 ripe tomato
2 eggs
1/4 cup hummus (homemade or store bought)
1/2 mashed avocado
1 teaspoon olive oil
Herbs/spices (Your choice. I used Penzy’s Sunny Paris, my favorite on eggs)

1.  Preheat nonstick griddle over medium-high heat. Spread the teaspoon olive oil.
2.  Slice the tomato into 4 slices. Lay on the griddle. Cook, flipping once, for a total of 2-3 minutes. (If you cook them longer, they will just get softer, which is okay, too.)
3.  Carefully crack your eggs on to the griddle (if large enough) or in another non-stick skillet. Cook them to your preference.
4.  Warm the hummus in the microwave until hot.  Scoop onto your plate.
5.  Layer tomatoes and eggs next to (or on) the hummus.  Add avocado.

Nutritional data:
Calories:        380
Fat:              28.9g
Sat fat:           5.7g
Chol:            423mg
Sodium:        215mg
Carbs:         17.6g
Fiber:            8.7g
Protein:       16.9g

I woke up hungry, but not knowing what I wanted to eat. I looked in the fridge and pantry and found these items. I was lucky because yesterday I scored some delicious tomatoes, sweet and ripe, at the local farmer’s market.

When I cook I don’t really use a recipe, I just put things that I like together. But it also pays to keep certain staples on hand at all times. I always keep eggs, avocados, and hummus on hand, and so I know I am always only a few moments away from a hearty breakfast, high in protein and fat to get my day started. I find that when I have a high protein/ high fat breakfast, I am not as hungry the rest of the day. (And it helps me hit my macronutrient goals of 40-50% of my calories from fat, 25% of my calories from protein and 30-35% of my calories from carbs.)

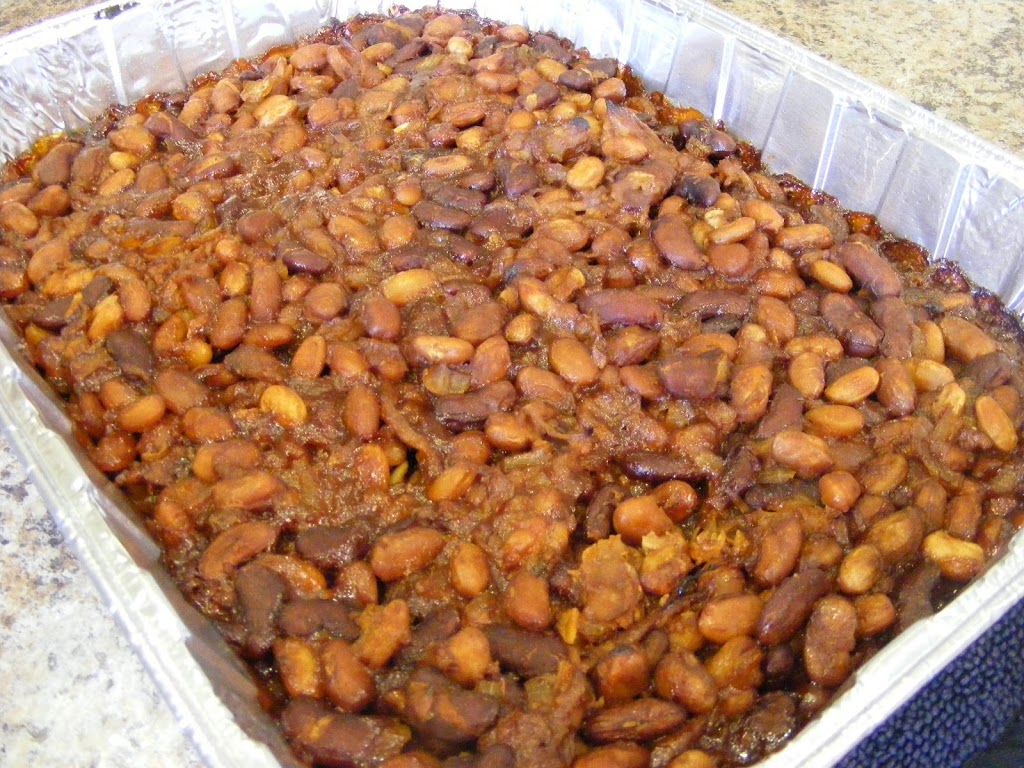
Baked Beans

Baked Beans (modified to further reduce sodium levels)
Serves 10

This recipe is far easier than you would guess and tastes better than anything you will find in a can or deli.

3 cups canned beans (any variety, or a mix of varieties) -OR- 1.5 cup raw beans that you precooked according to label directions
1 medium onion, finely minced (about 1.5 cup)
1 tablespoon olive oil
3 clove garlic, mashed and minced
1 teaspoon fresh ginger
4 tablespoons cider vinegar
2 tablespoons each: tomato paste, brown sugar, meat drippings (if using meat)
1/2 tablespoon each: Worcestershire sauce, Dijon mustard, dry mustard (optional, but important)
4 ounces shredded pork (or shredded beef, ground beef, ham, bacon, or no meat at all)

1.  Preheat oven to 350F.
2.  Prepare beans according to label instructions if raw. If canned, open cans and rinse.
3.  In a large non-stick skillet, add olive oil and saute onions, garlic and ginger over medium heat until beginning to turn translucent (about 5 minutes.)
4.  Add beans, and all remaining ingredients. Stir over medium-high heat until evenly hot.
5.  Pour into an 8×8 baking pan or similar dish.  Bake uncovered until thickened (about 30 minutes, but 45-60 won’t hurt it.)

Nutritional data: (updated to reflect no ketchup or BBQ sauce)
Calories:       122
Fat:               3.1g
Sat fat:          0.7g
Chol:             12mg
Sodium:         55mg
Carbs:         23.4g
Fiber:            11g
Protein:         10g

Note:  My pressure cooker recipe for beans is simple.  Add raw, unsoaked beans to the cooker and add an equal volume of water. Seal lid and set for high pressure. Place on heat.  When steam begins releasing from valve, reduce heat to a low simmer for 25 minutes. Remove from heat, set in sink and cool quickly with cold running water. Open the lid when the pressure is gone (and follow your pressure cooker’s specific instructions for safety.)

The next time I make the beans, instead of using water, I will use beer for added flavor.

Happy 17th Birthday to My Son

No special message today.

I just thought I’d acknowledge my son’s birthday.  His party is tomorrow, which is being combined with a Father’s Day celebration for our parents. The party will include my pulled pork, homemade baked beans, cucumber salad, chips/dip, watermelon and an ice cream cake.

Pictures and menu details later.

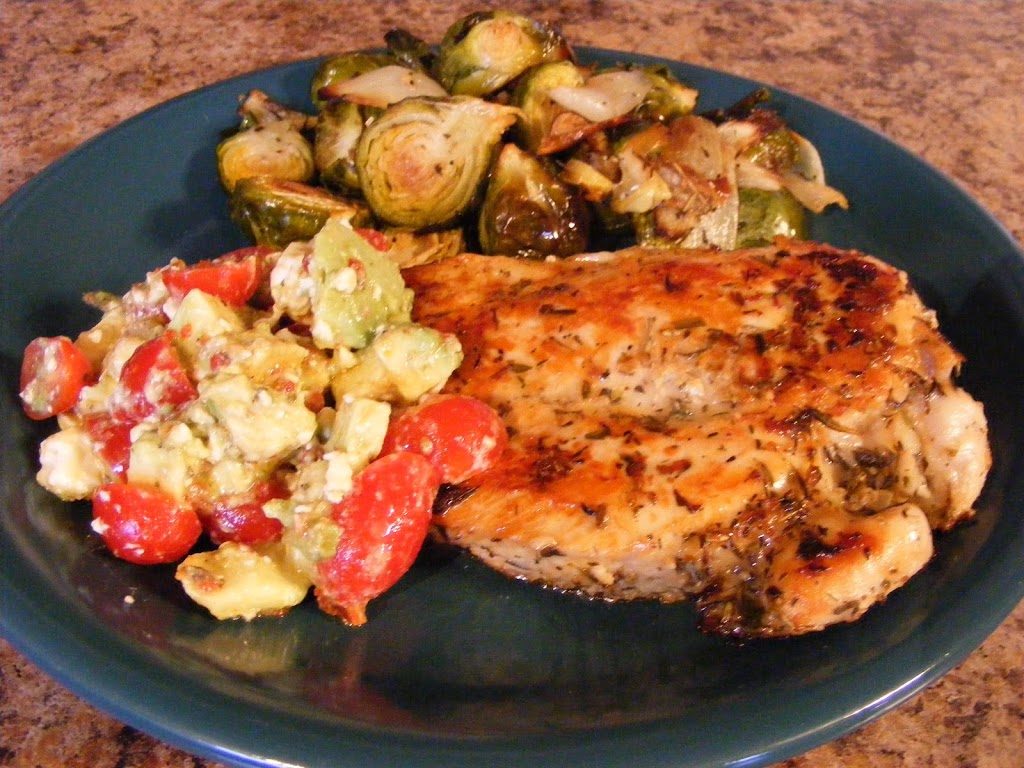
Rosemary Chicken with Tomato-Avocado Salsa

Rosemary Chicken with Tomato-Avocado Salsa
Serve 6

6 boneless, skinless chicken breasts (4 ounces each)
3 tablespoons olive oil
3 tablespoons red wine vinegar
1 tablespoon fresh rosemary (or 1 tsp dried)
2-3 cloves garlic, crushed and minced
Black pepper

1.  Place chicken breasts inside a Ziploc freezer bag. With a rubber mallet or similar tool, pound the breast to 1/4 inch thickness. Season the breasts with black pepper.
2.  Combine oil, vinegar, rosemary and garlic in another Ziploc bag. Place chicken in bag and toss to coat. Place in refrigerator for 30 minutes.
3.  While the chicken rests in the refrigerator, prepare the salsa (below.)
4.  Preheat a non-stick skillet with cooking spray and heat over medium high heat. Place each breast in skillet and cook until done (about 3 minutes per side.)
5.  Serve with salsa.

Nutritional data (1 chicken breast):
Calories:         308
Fat:               16.6g
Sat fat:            3.8g
Chol:               98mg
Sodium:           62mg
Carbs:             1.2g
Fiber:              0.2g
Protein:         37.7g

Tomato-Avocado Salsa
Serves 6

1 tablespoon chopped fresh oregano (or 1 tsp dried)
1 tablespoon olive oil
2 tablespoon red wine vinegar
1 clove garlic, crushed and minced
2 cups grape tomatoes, halved
1/4 cup crumbled feta cheese
1 ripe avocado, peeled and chopped

1.  In a 1 quart or larger bowl, combine first four ingredients with a whisk.
2.  Add tomatoes, cheese and avocado.
3.  Serve immediately.

Nutritional data (1/2 cup portion):
Calories:         126
Fat:               10.9g
Sat fat:            2.6g
Chol:              8.3mg
Sodium:          112mg
Carbs:             6.3g
Fiber:              3.1g
Protein:           2.6g

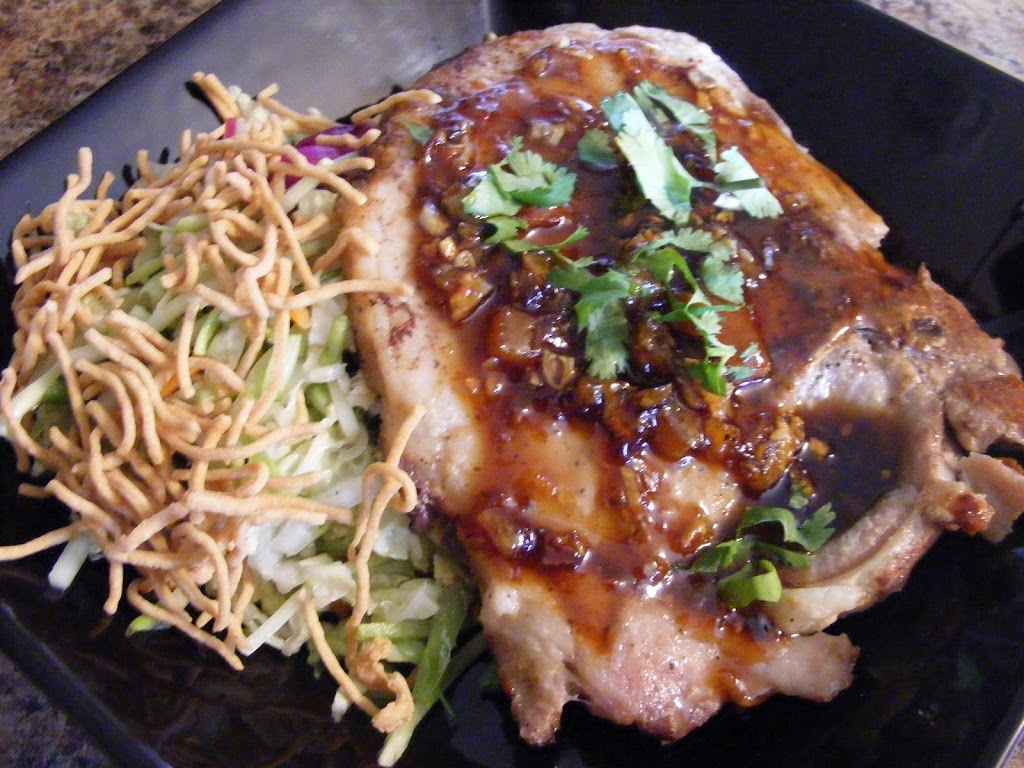
Ginger Sesame Pork

Ginger Sesame Pork
Serves 4

4 pork chops (bone-in or boneless) approximately 6 ounces each
1 teaspoon olive oil

3 cloves garlic, mashed and minced
2 tablespoon fresh ginger, crushed and minced
2 tablespoons toasted sesame oil, divided
2 tablespoons orange marmalade
1 tablespoon rice wine vinegar
2 tablespoon water
1 teaspoon Hoisin sauce
4 tablespoons fresh cilantro, chopped

1.  Season pork chops with pepper. (Use Chinese Five Spice powder if you have it.)
2.  Heat a non-stick skillet over medium high heat, add the olive oil and place the pork chops in it.  Cook until finished (3-4 minutes per side, depending on thickness.)  You may need to cook them in two batches if your skillet is not large enough to hold them all.
3.  Remove pork from heat and cover to keep warm.
4.  In the same skillet, add half the sesame oil, garlic and ginger. Saute over med-high heat until fragrant (about one minute.)
5.  Add remaining sesame oil, marmalade, vinegar, water and Hoisin sauce. Stir constantly until the mixture is combined and hot, about 2 minutes.
6.  Serve about 2 tablespoons sauce over each chop.
7.  Top with cilantro.

Nutritional data:
Calories:      335
Fat:            21.5g
Sat fat:         6.4g
Chol:            83mg
Sodium:      380mg
Carbs:         6.9g
Fiber:          0.1g
Protein:     31.5g

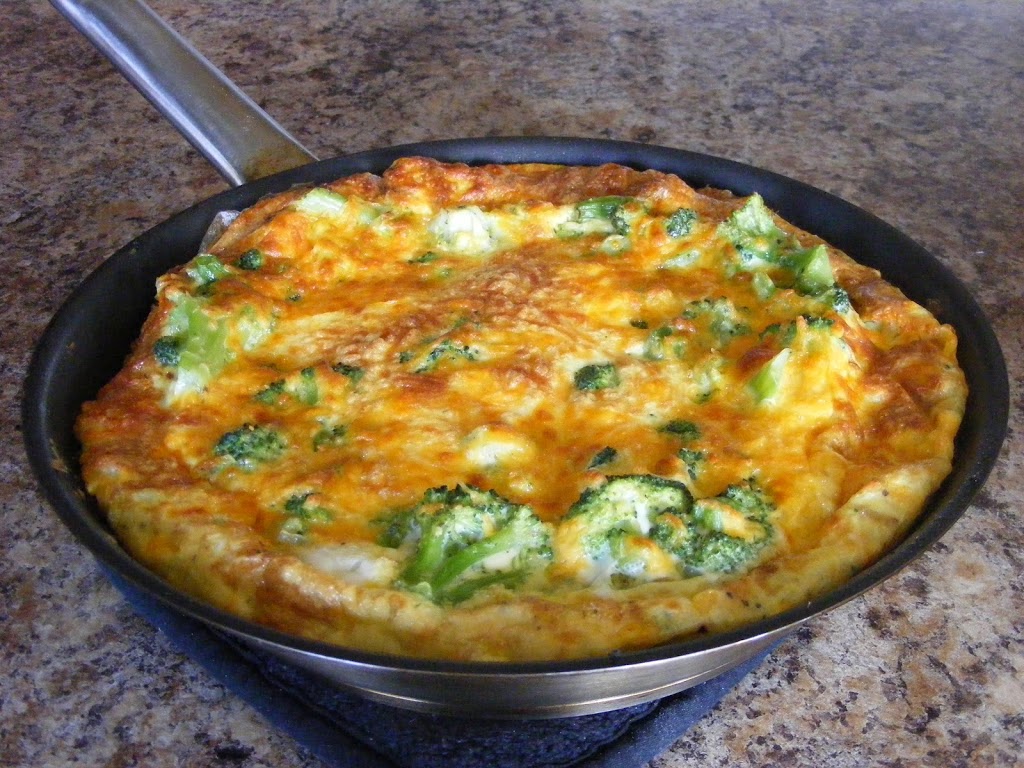
Broccoli and Cheddar Frittata

Broccoli and Cheddar Frittata
Serves 4

12 ounce bag of frozen broccoli florets, thawed
2 tablespoons onions, diced
8 egg whites
2 whole eggs
2 teaspoons olive oil
1/2 cup shredded cheddar cheese

1.   Turn on your oven broiler to high.
2.   Separate the 8 eggs into a large bowl.  Throw away the yolks (or use an equivalent amount of egg white or egg substitute.)
4.   Add the two whole eggs to the bowl of whites and whisk until fully mixed.
5.   Place olive oil in an oven-safe non-stick skillet. When hot, add onion and saute for 2-3 minutes.
6.   Add the broccoli and saute for 5-8 minutes over med-high heat.
7.   Pour the egg mixture over the broccoli. Allow to set for 1 minute.
8.   Using the edge of a rubber scraper, carefully lift one edge of the eggs and tilt the skillet so that raw eggs run into that pocket. Repeat all around the edge until most of the surface is wet, but setting.
9.   Sprinkle the cheese on the eggs and place under the broiler for 5 minutes.
10. Cut into fourths and serve immediately.

Nutritional data:
Calories:        203
Fat:              12.3g
Sat fat:           4.9g
Chol:             226mg
Sodium:         289mg
Carbs:            5.6g
Fiber:             1.8g
Protein:        18.9g

This is very similar to my earlier recipe, Broccoli and Cheddar Quiche, but without the crust, which greatly reduces the carbs, fats and calories.

Alternative:
Use more whole eggs (1 whole egg will replace 2 egg whites)
Experiment with different cheeses
Use different vegetables
Add meats

I Love This Time of Year

I don’t have a large garden, mostly because I really dislike weeding gardens (a holdover from my childhood summers.) But I use several “upside down” systems to grow tomatoes and peppers, as well as a small container garden for herbs. Right now it is June 19 and already I have peppers and tomatoes forming on the plants.

The yellow-ish peppers are Sweet Hungarian peppers and the others are jalapenos.
These are some Sweet 100 cherry tomatoes. In the background you can see another planter with Lemon Drop tomatoes. I prefer growing cherry tomatoes because they work so well in salads.
I also grow a few herbs. In the foreground is the simple but important curled parsley, with chives, basil and rosemary completing the set. In another pot, started later than these, I have more parsley, garlic chives and a single Thai hot chile plant. We will see how those turn out.
It’s not a big garden but it is nice to harvest some of my own veggies. When the rosemary gets larger, I used branches of it on my grill. I lay the branches on the hot grates and place the meat, usually a pork roast of some sort, on the branches. It flavors the meat nicely and prevents the meat from sticking to the hot grates. Of course, the rosemary leaves stick to the meat instead but that makes eating a multi-sensory as you pick them off the food.